How to Access and Manage Settings
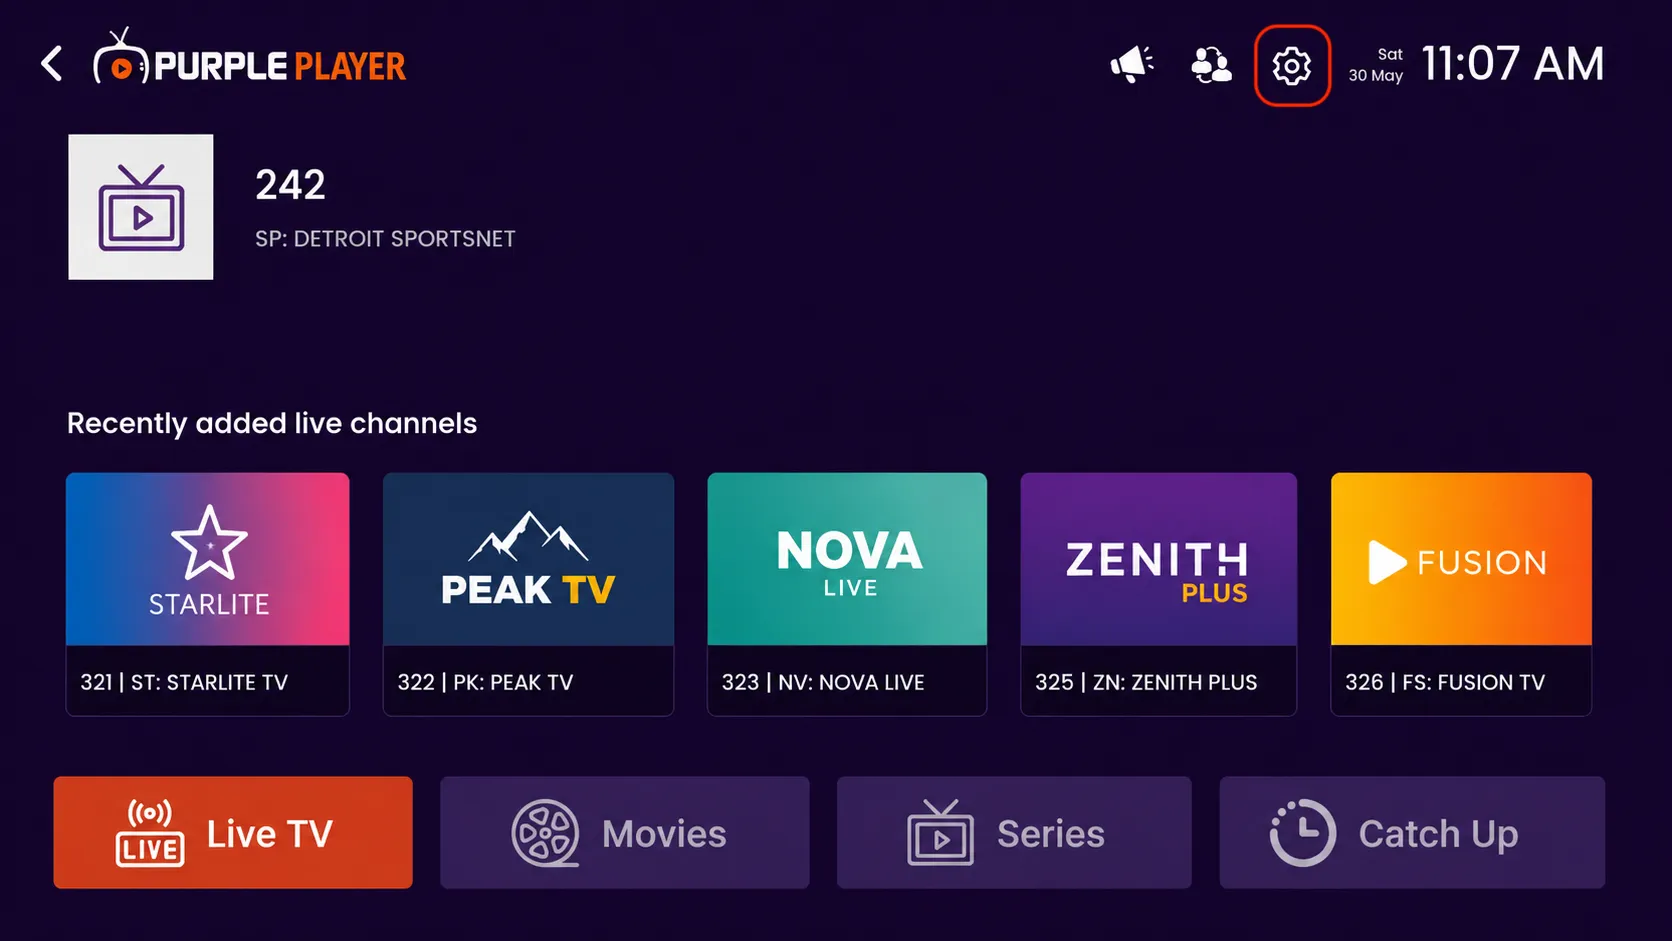
Step 1: Open Settings
Click on the highlighted settings icon from the top-right corner of the home screen to access the app settings and customization options.
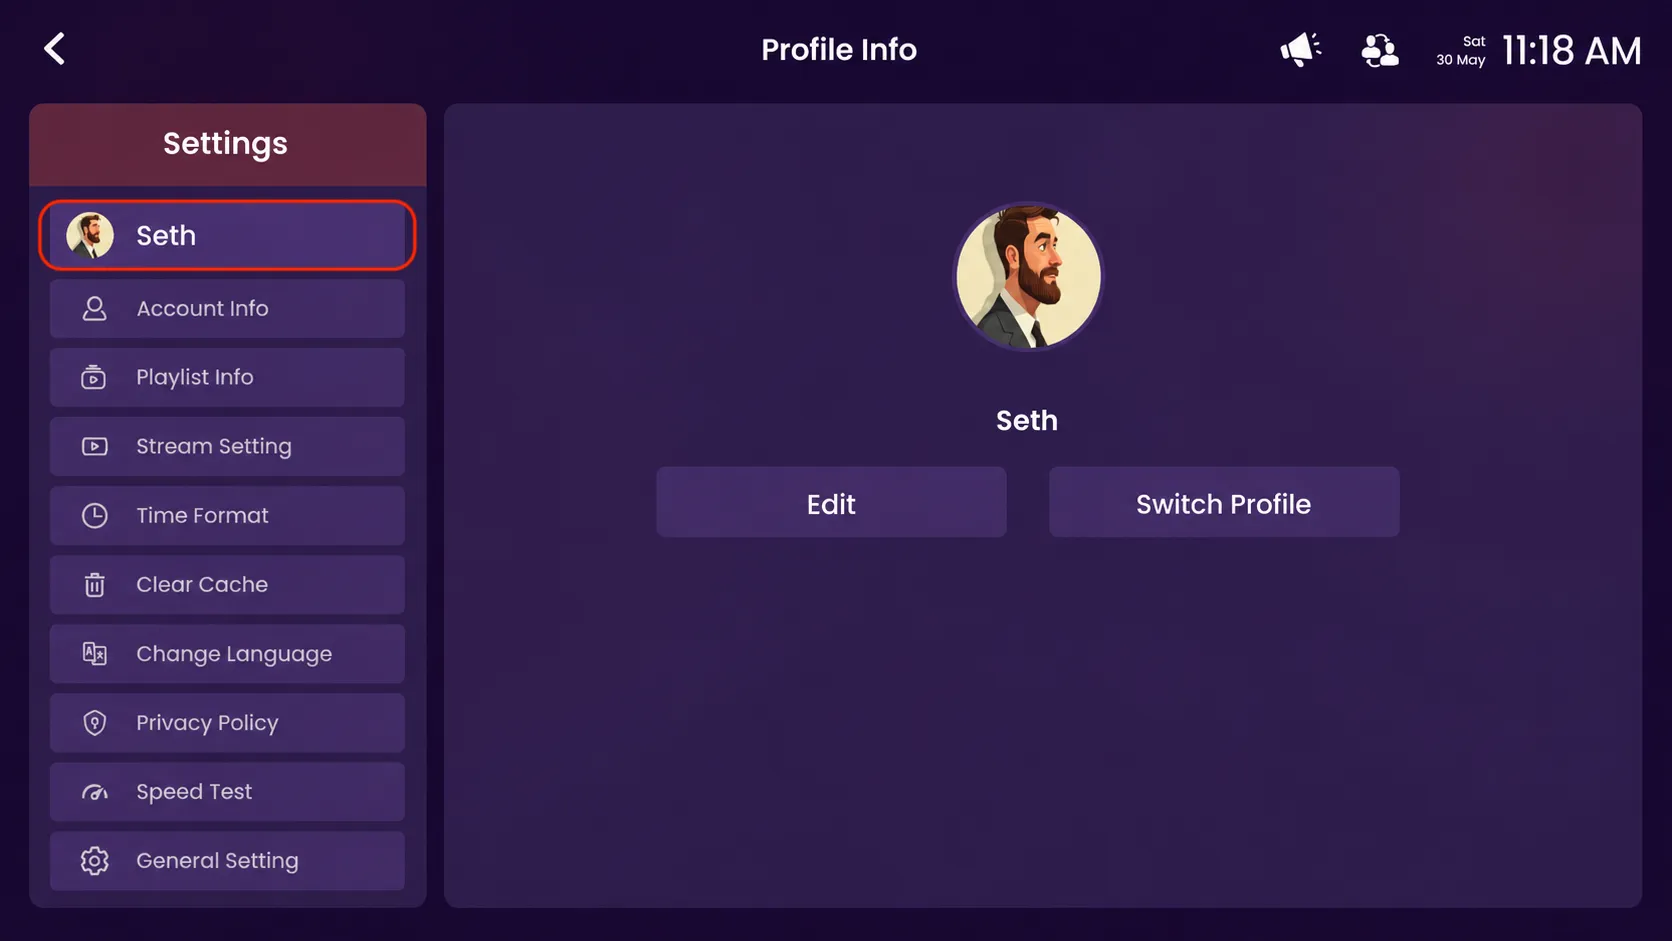
Step 2: Click on Profile
Click your profile on the Profile Info screen to access your profile settings.
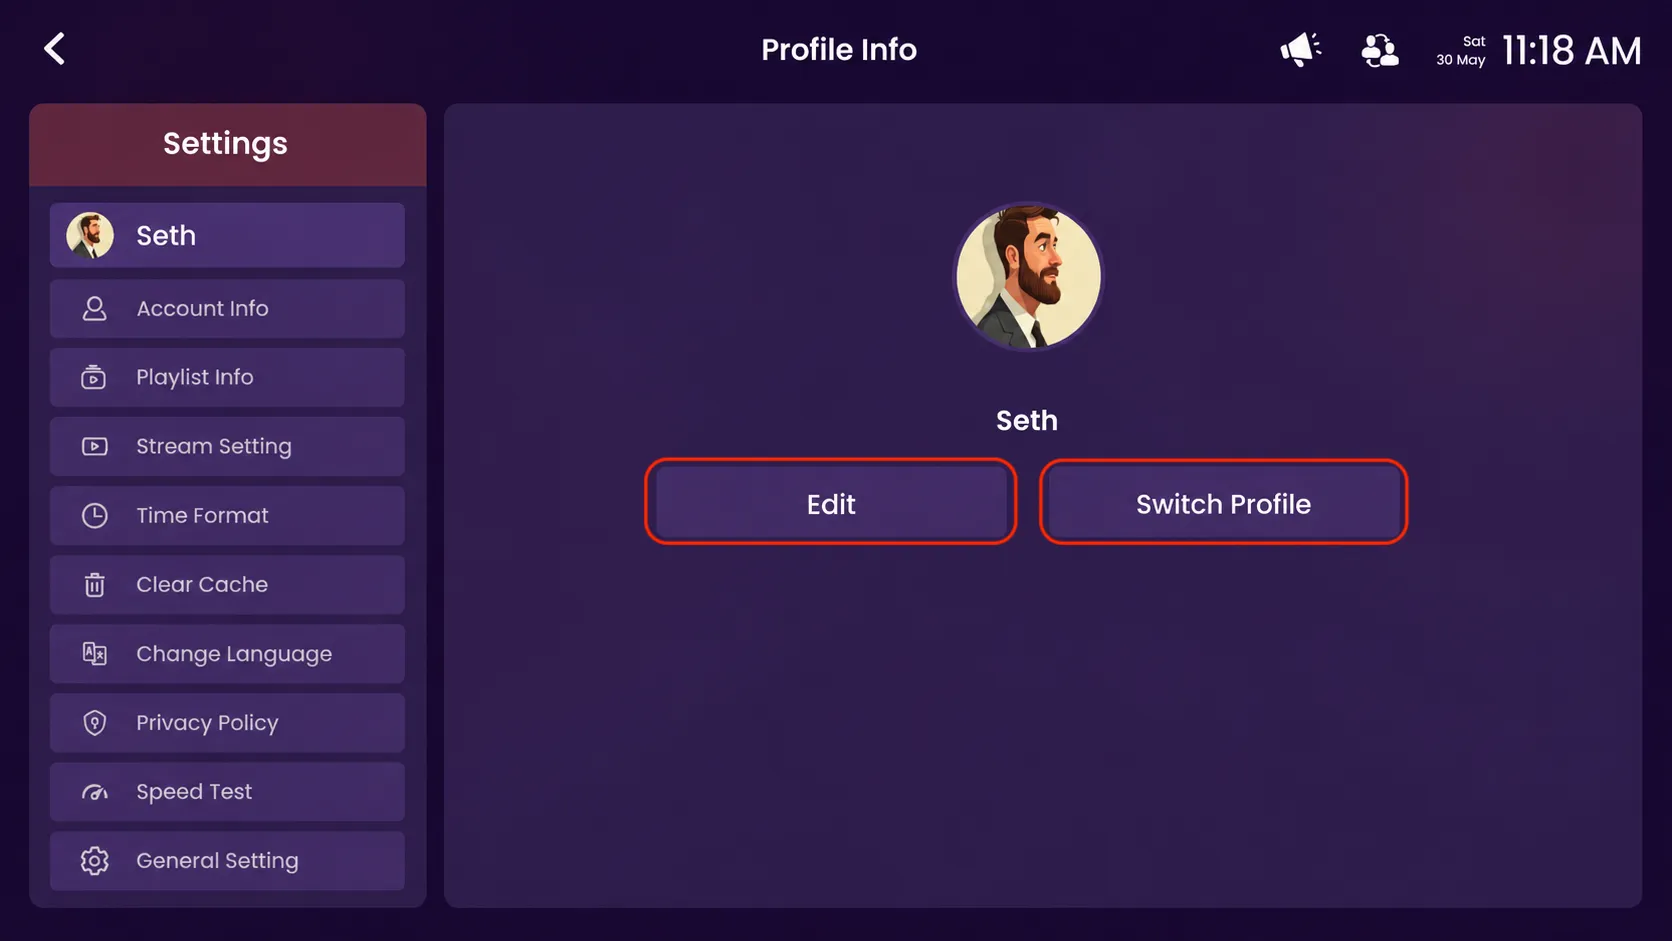
Step 3: Edit or Switch Profile
From the Profile Info screen, click "edit" to modify your profile details or click "switch profile" to switch to another available profile.
Step 4: Click on Account Info
Click on the highlighted Account Info option to view your account details.
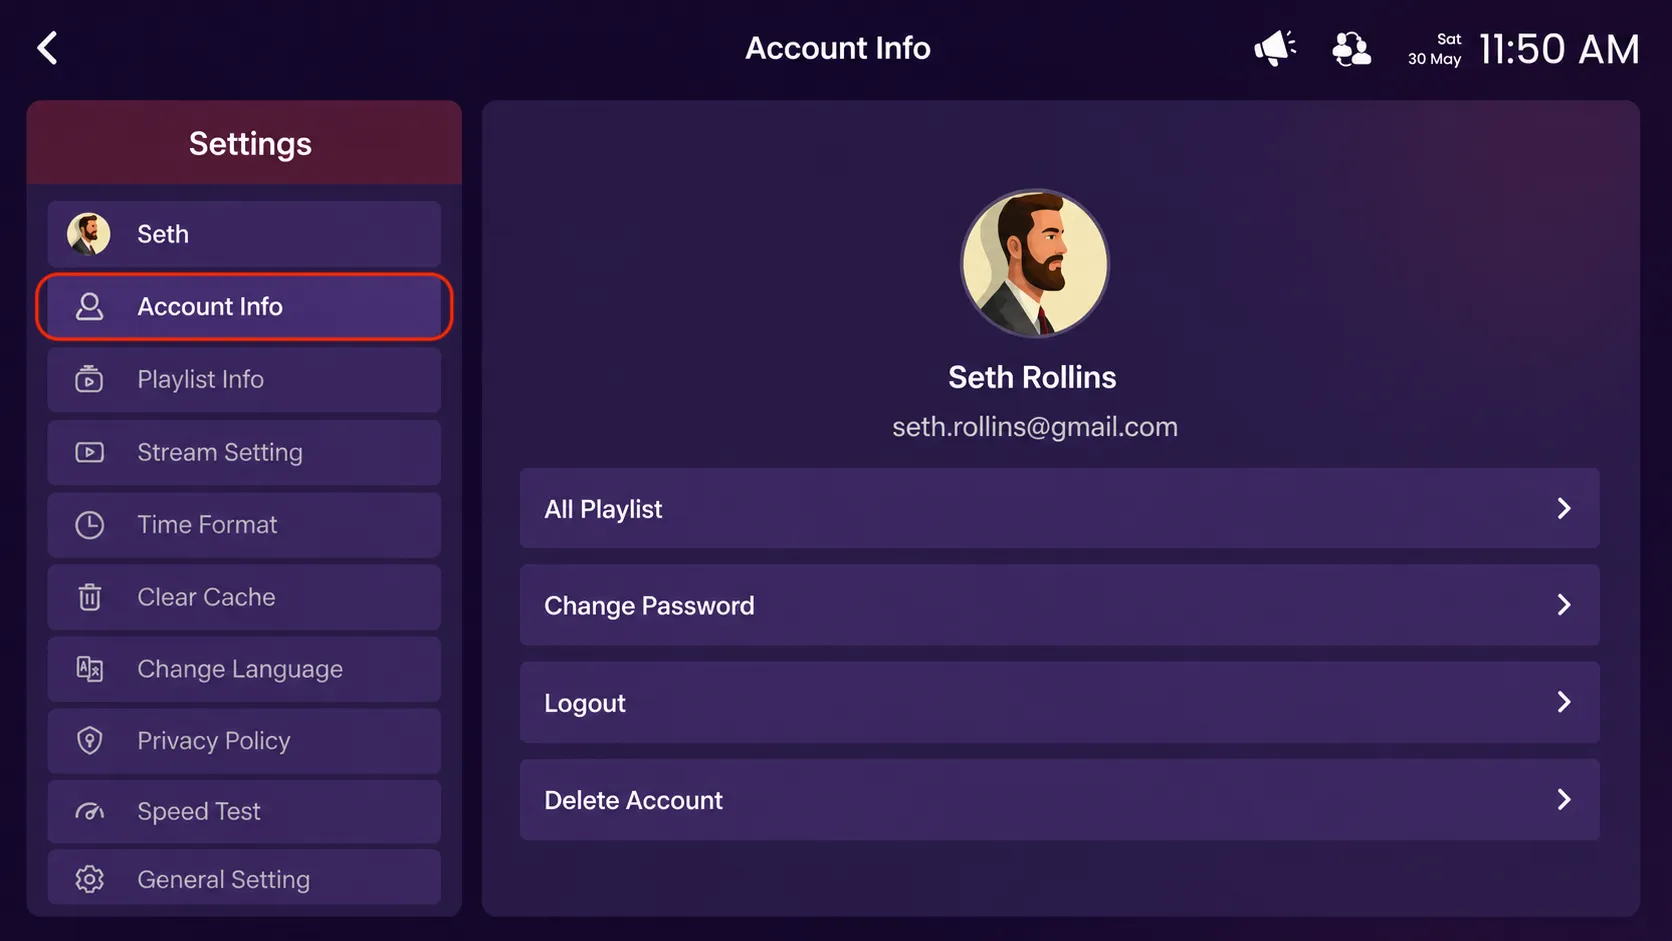
Step 5: Manage Account Options
- All Playlists – View and manage all playlists added to your account.
- Change Password – Update your account password for better security.
- Logout – Sign out from your current account safely.
- Delete Account – Permanently remove your account and account data.
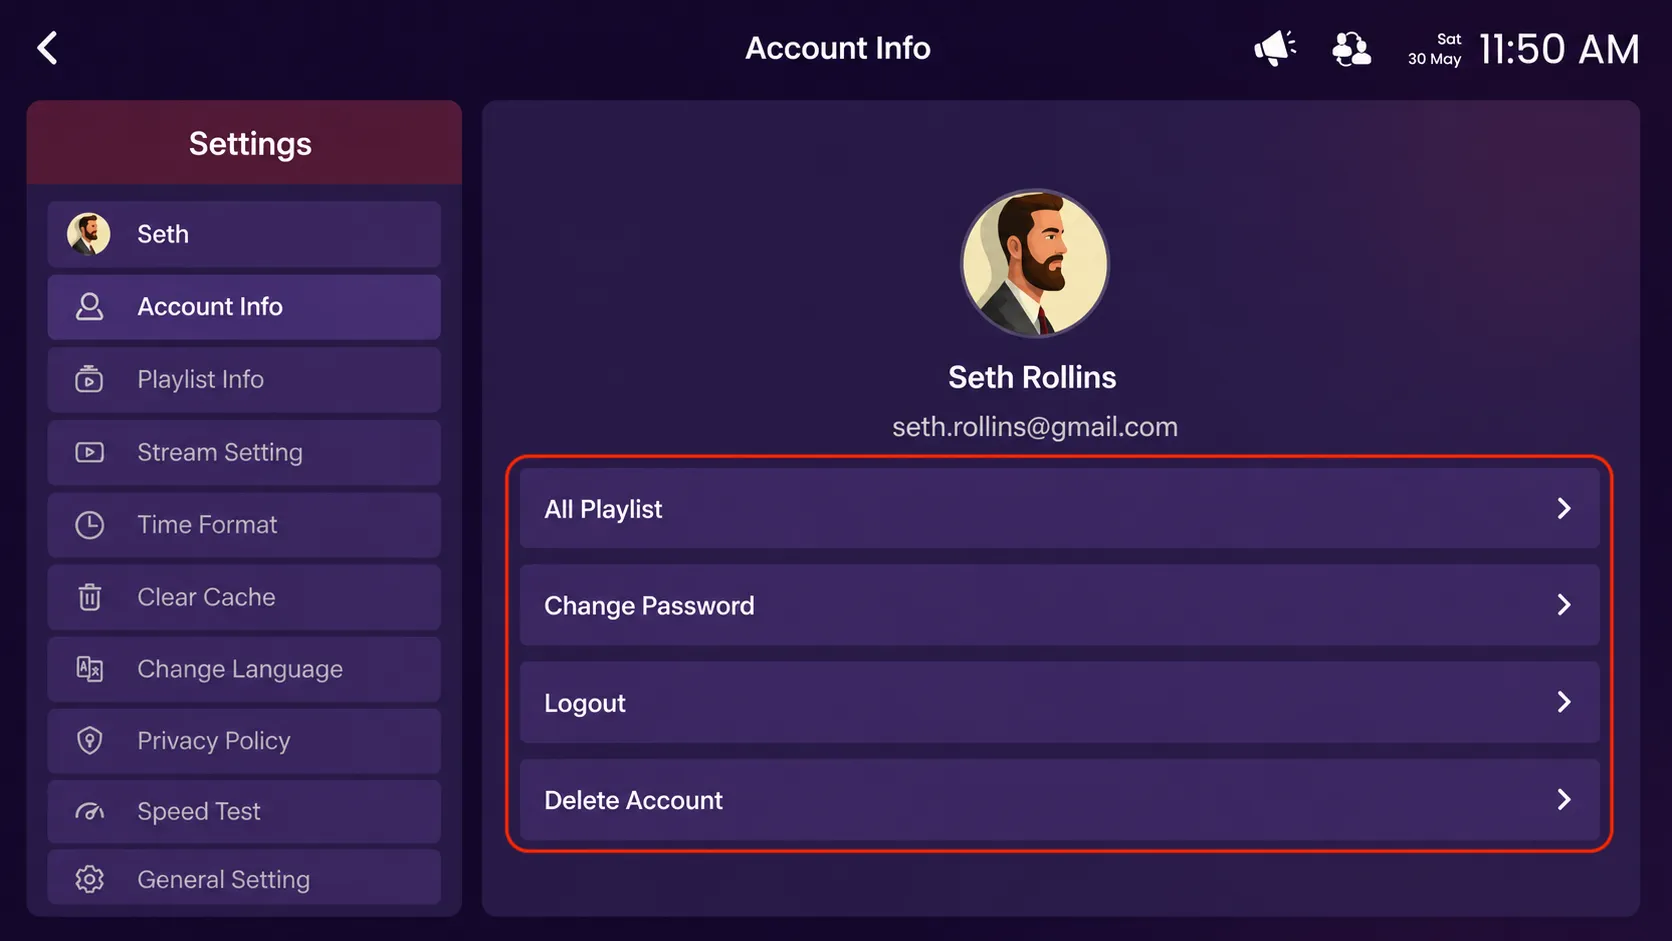
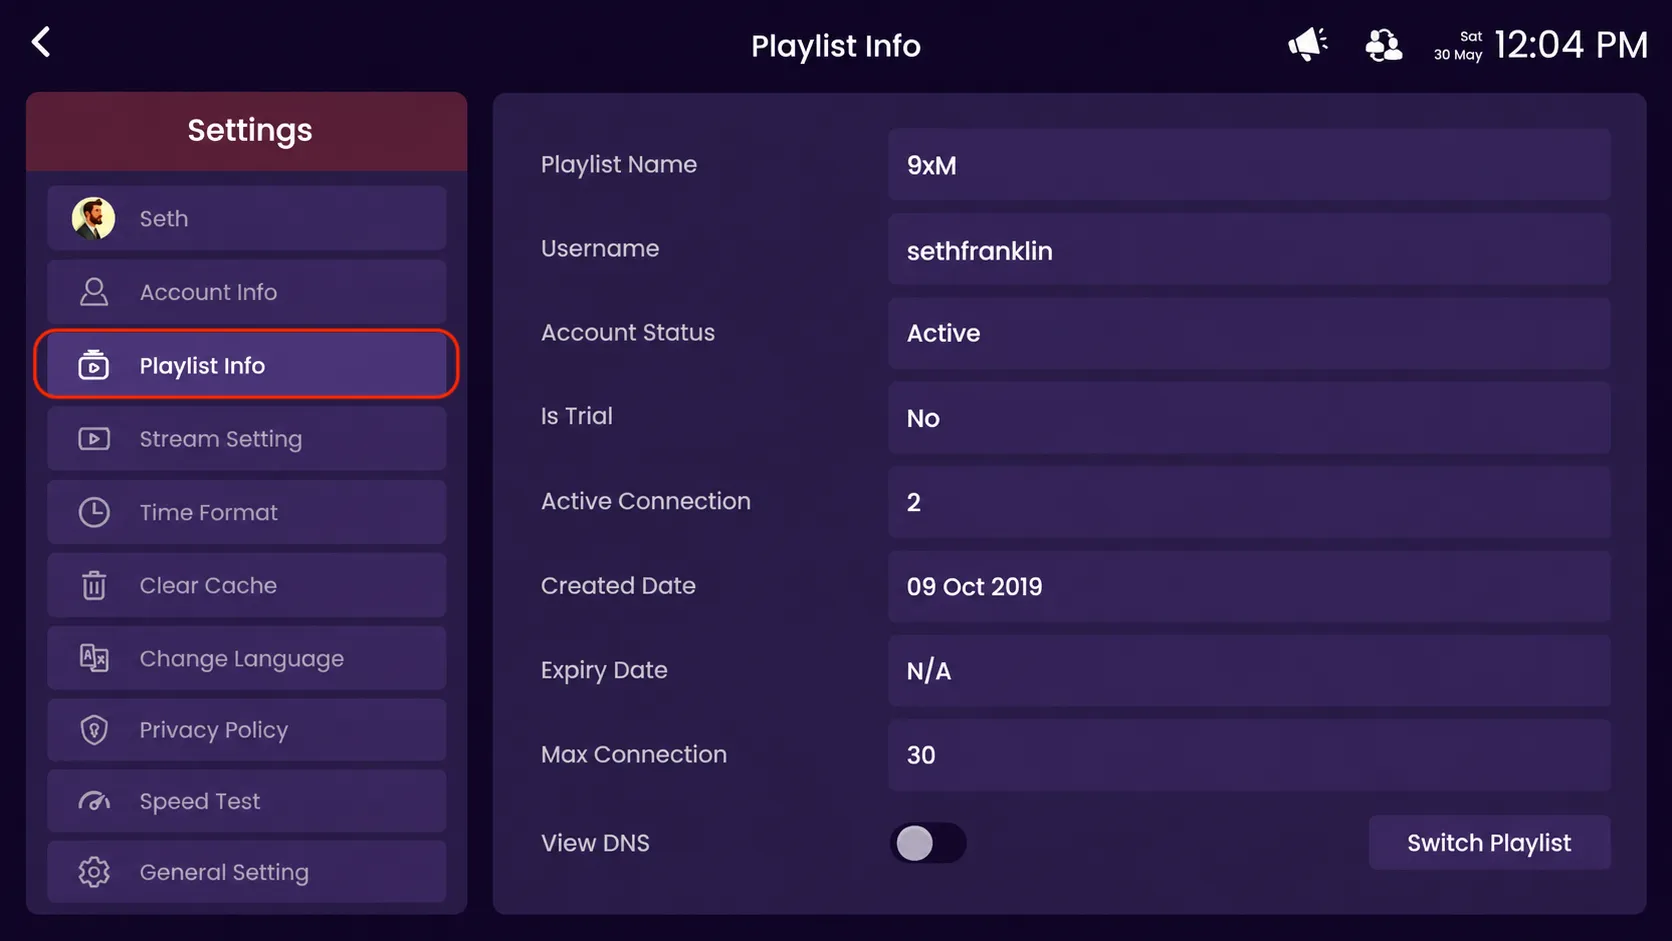
Step 6: Click on Playlist Info
Click on the highlighted playlist info option from the settings menu to view your playlist details.
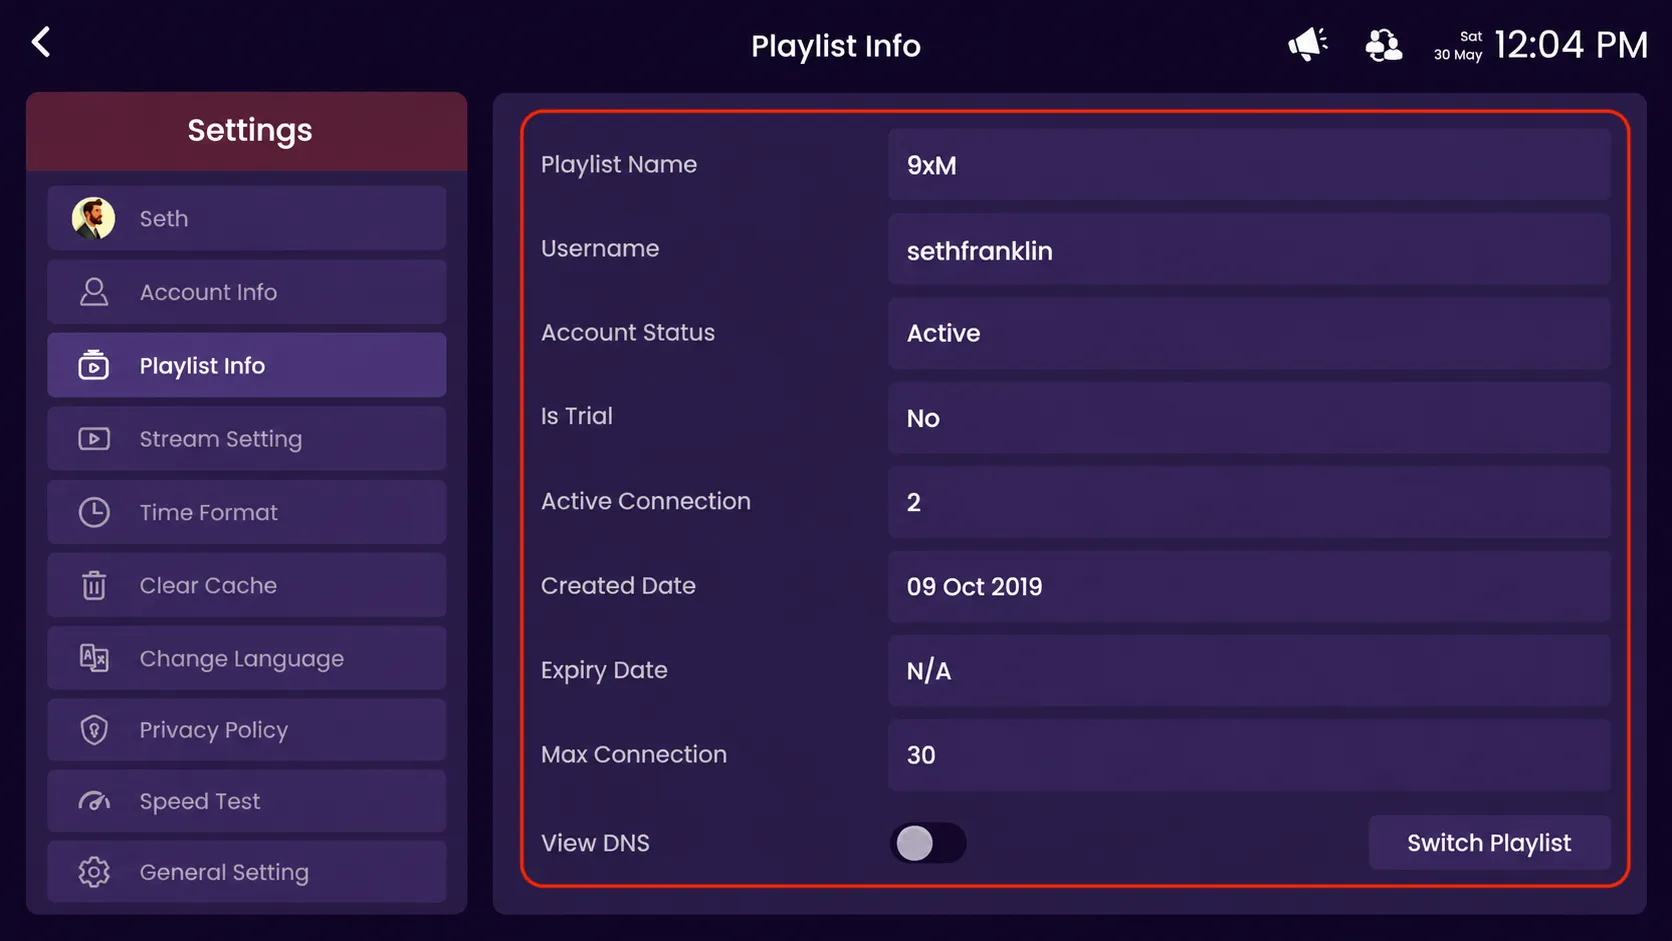
Step 7: View Playlist Details
- Playlist Name – Displays the name of your added playlist.
- Username – Shows the username linked with the playlist.
- Account Status – Check whether your playlist account is active or inactive.
- Is Trial – Indicates if the playlist is a trial account or a full subscription.
- Active Connection – Displays the number of currently active connections.
- Created Date – Shows the date when the playlist was created.
- Expiry Date – Displays the playlist expiration date.
- Max Connection – Shows the maximum number of allowed connections.
- View DNS – Enable this option to view the DNS/server details.
- Switch Playlist – Quickly switch between different added playlists.
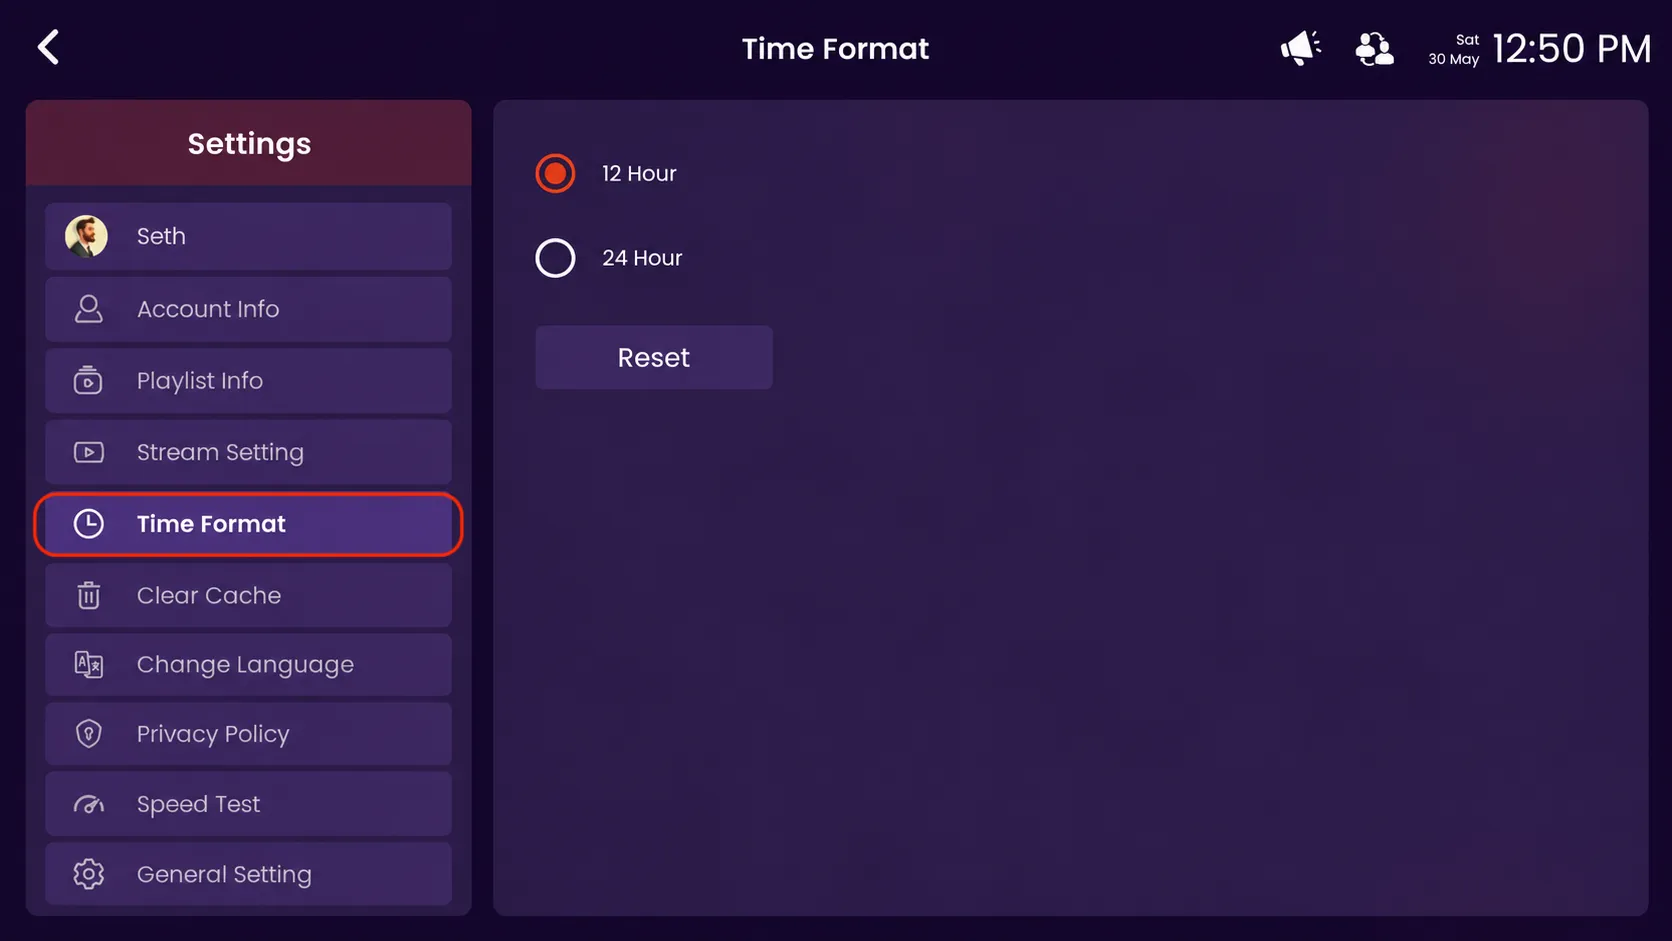
Step 8: Click on Time Format
Click on the highlighted time format option to change and manage the clock display format.
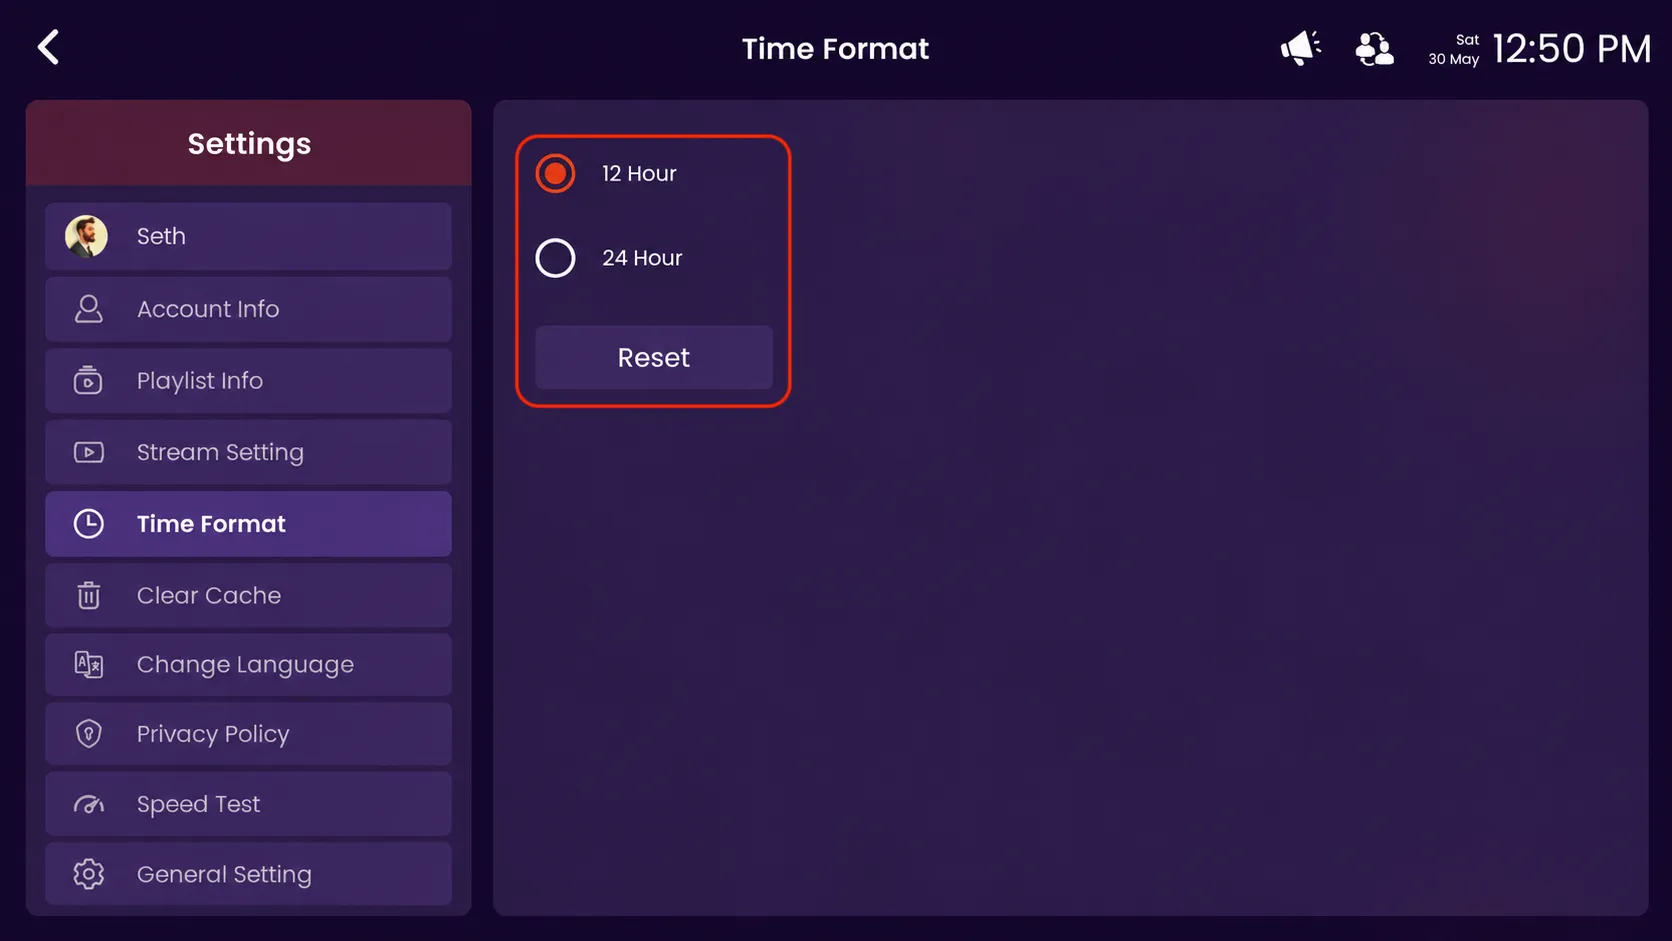
Step 9: Select Time Format
- 12 Hour – Select this option to display time in 12 Hour format (AM/PM).
- 24 Hour – Select this option to display time in 24 Hour format.
- Reset – Click Reset to restore the default time format setting.
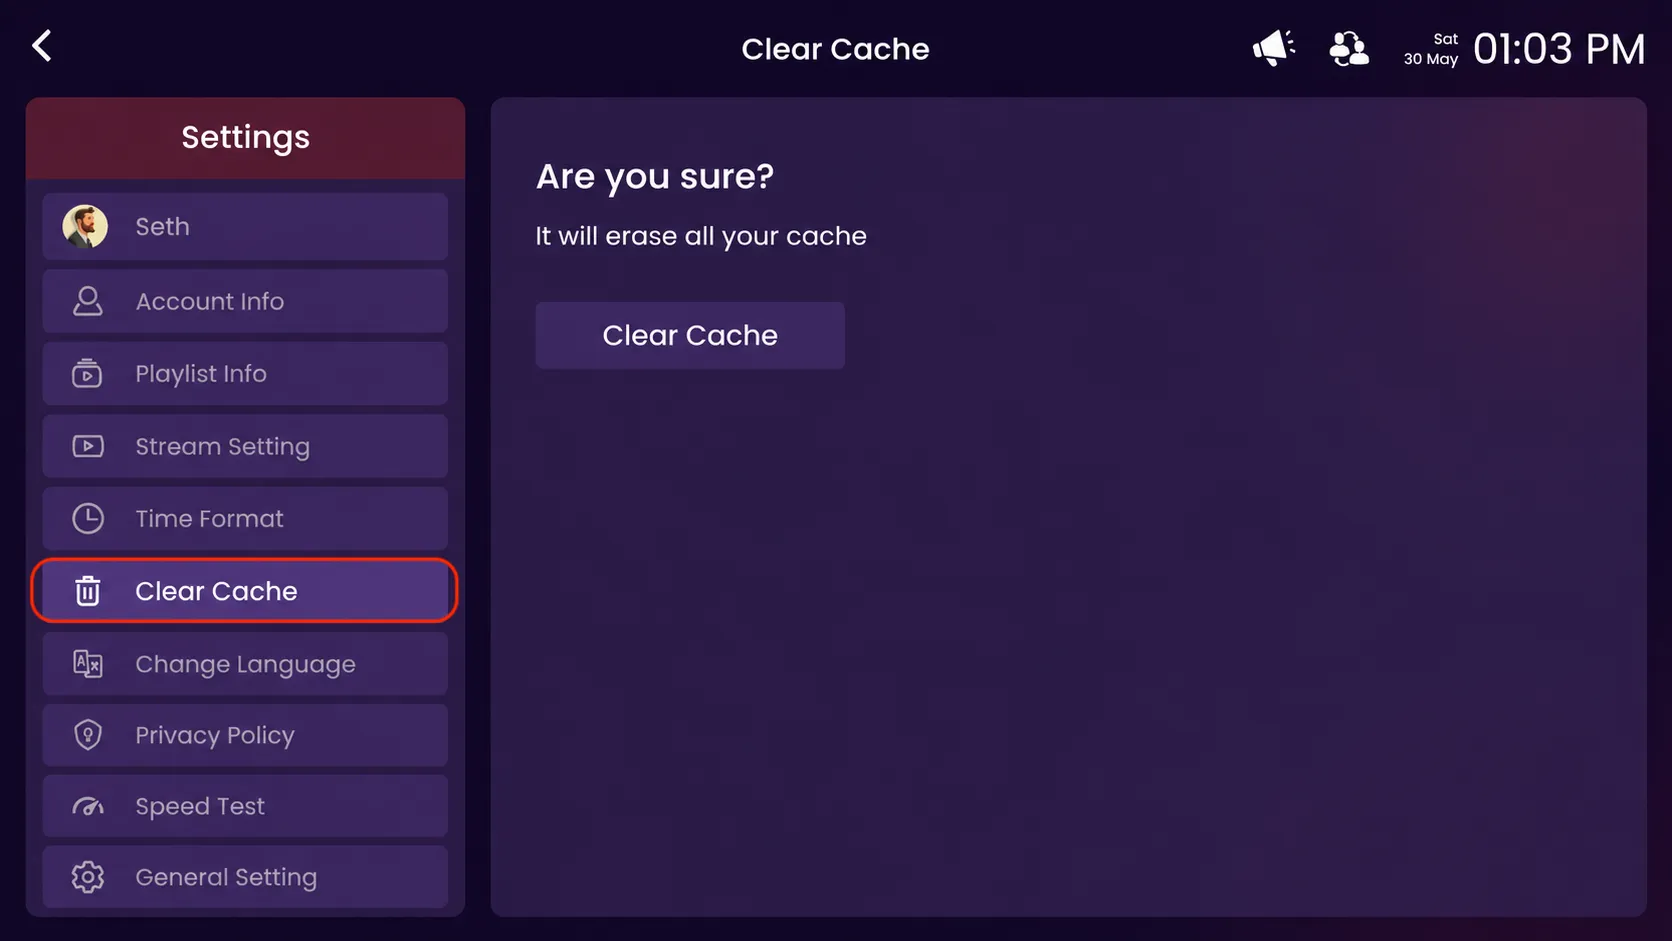
Step 10: Click on Clear Cache
Click on the highlighted Clear Cache option in the settings.
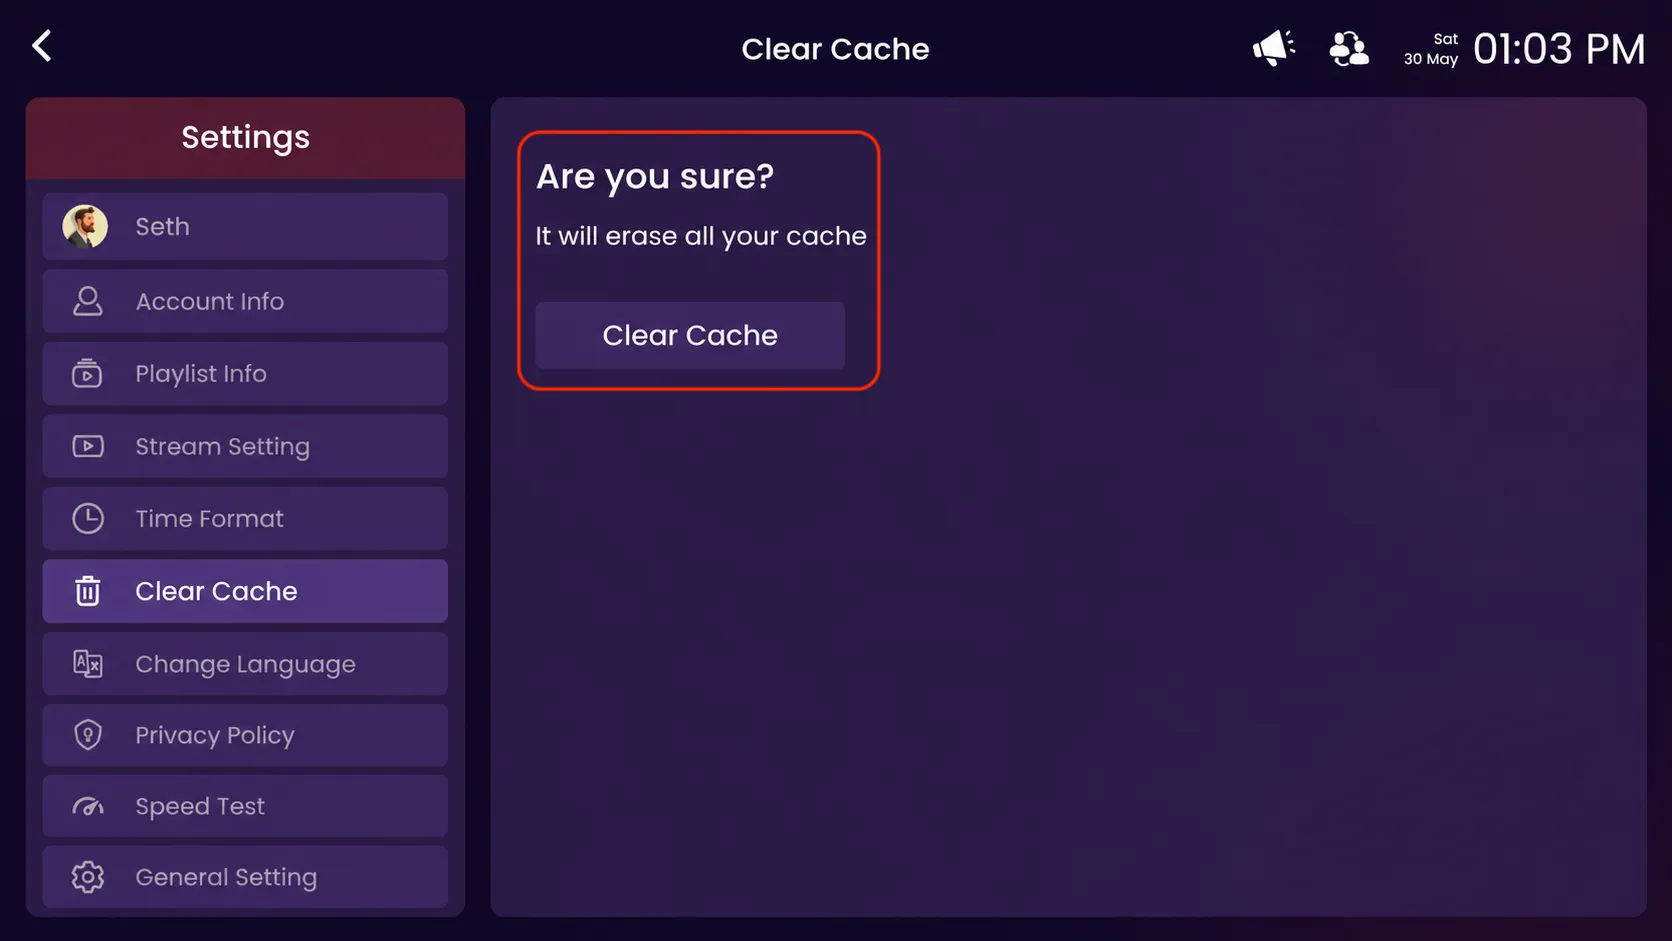
Step 11: Confirm Clear Cache
Click on the highlighted Clear Cache button to confirm and remove all temporary cached data from the app. This helps refresh the application and improve performance.
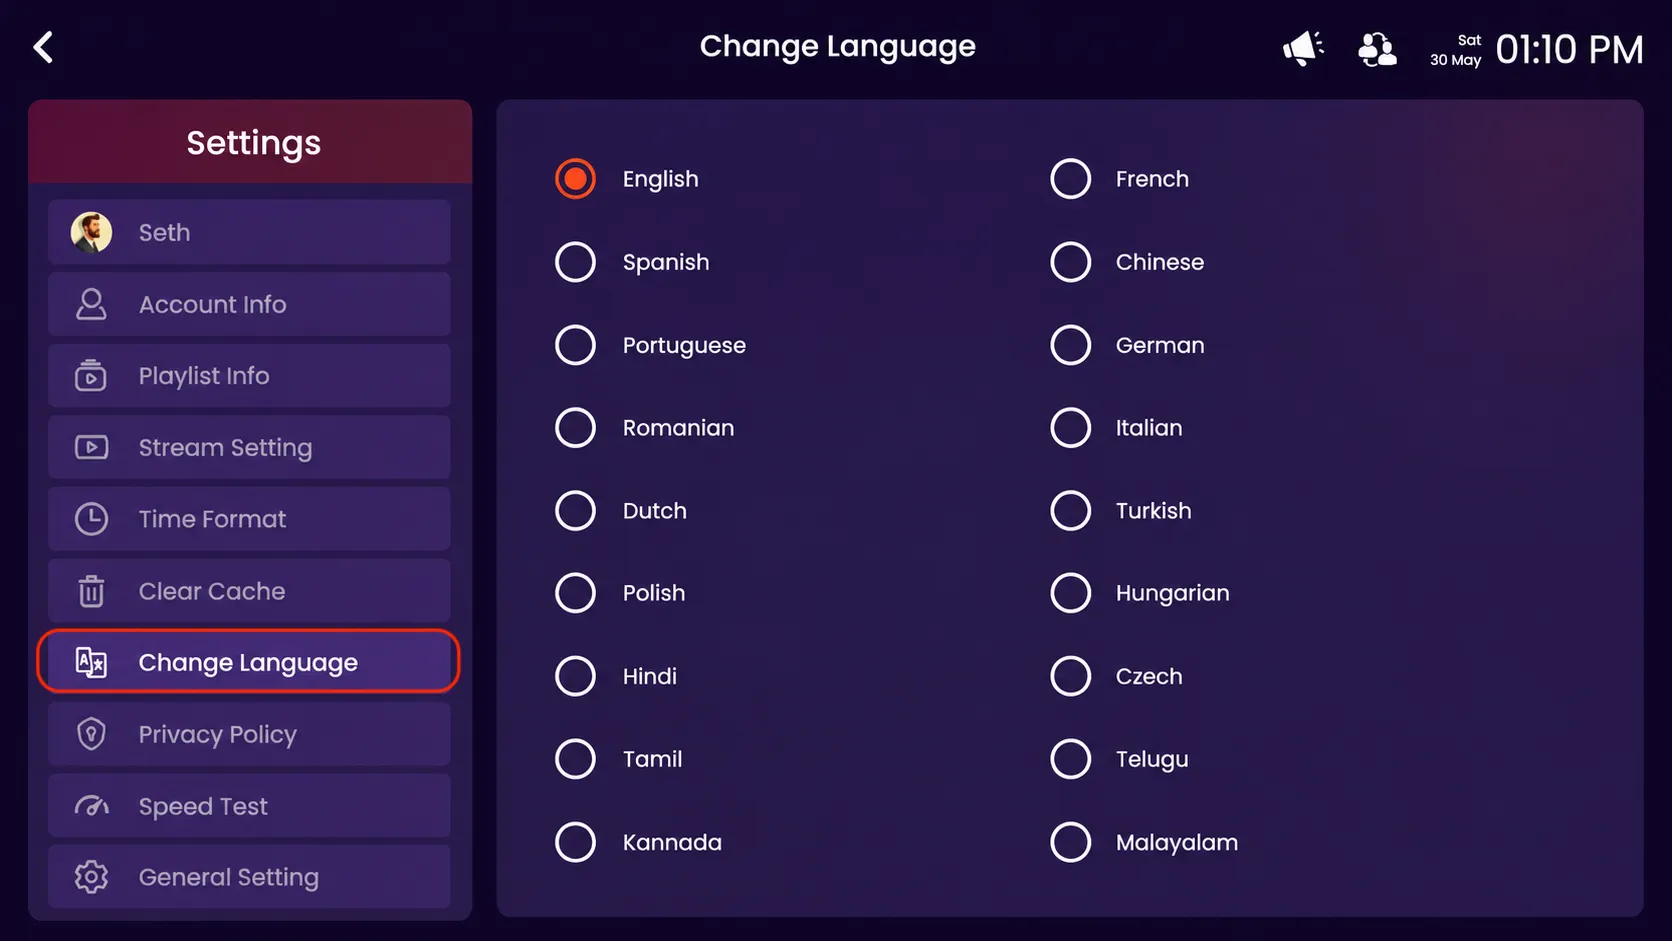
Step 12: Click on Change Language
Click on the highlighted Change Language option in the Settings.
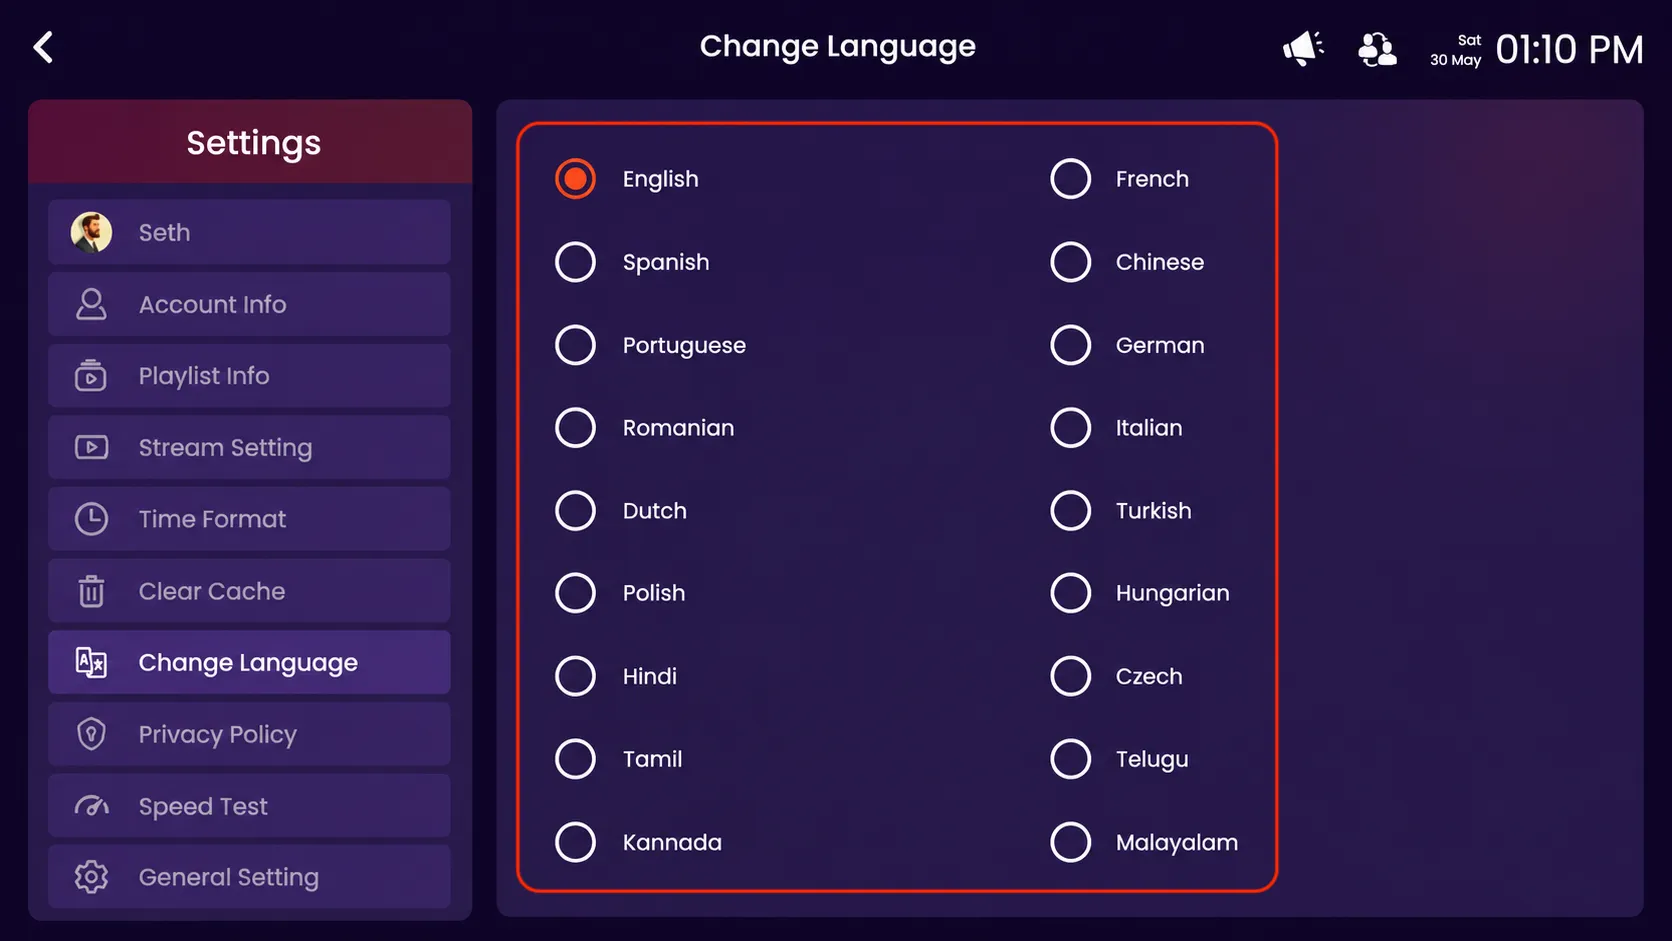
Choose your preferred app language.
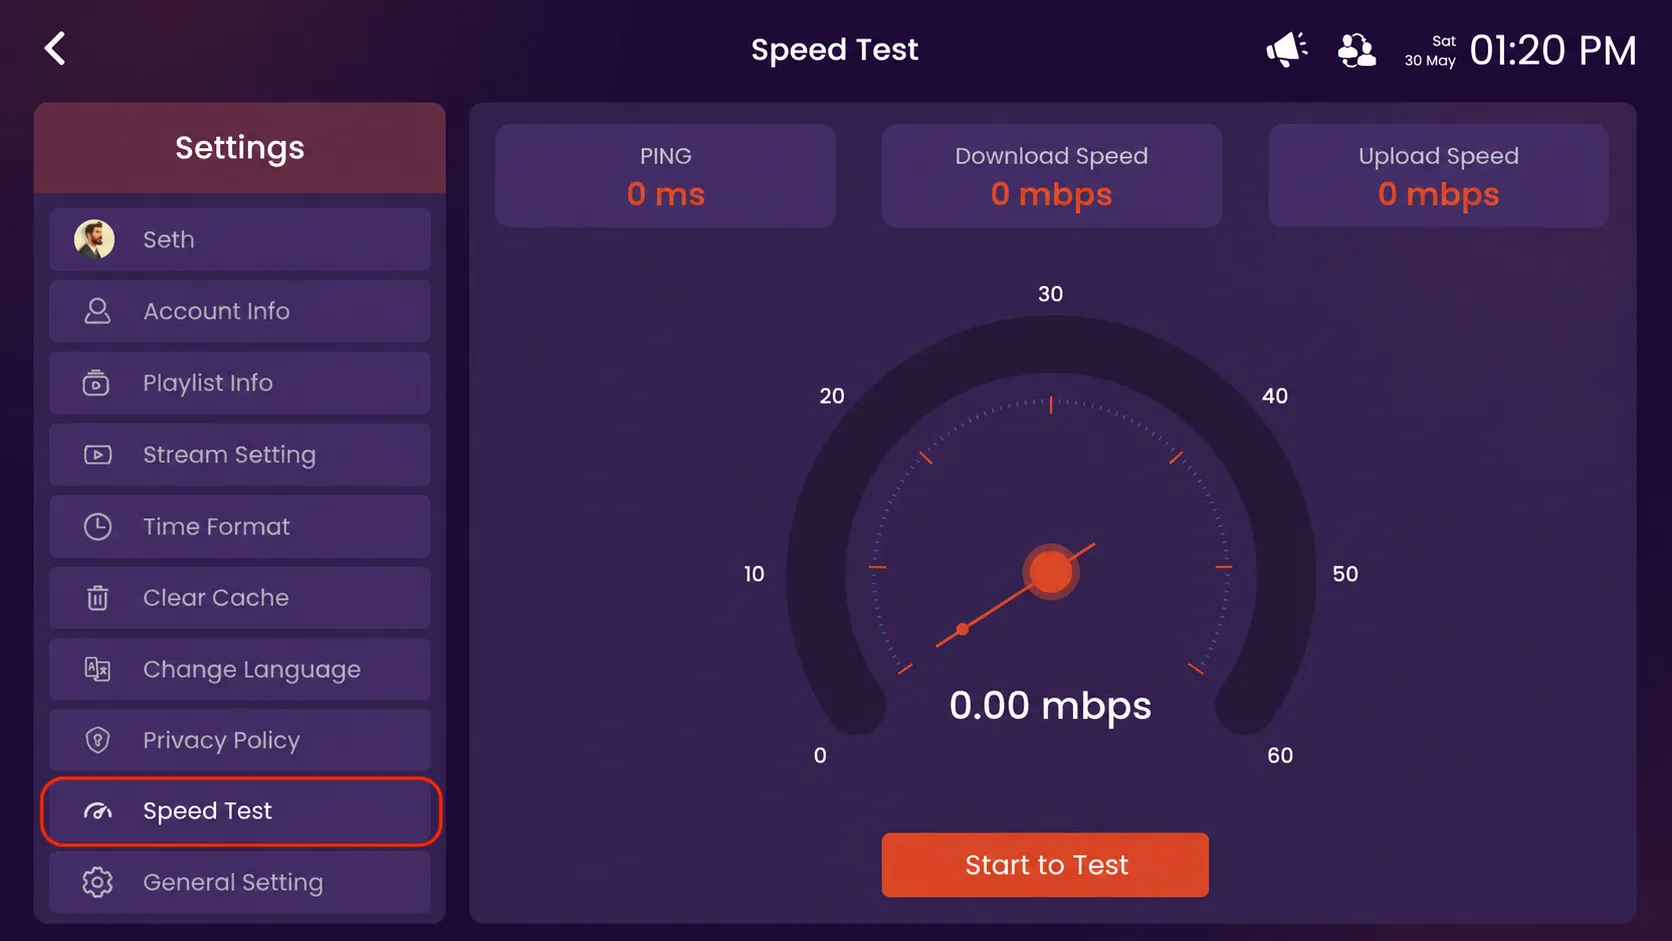
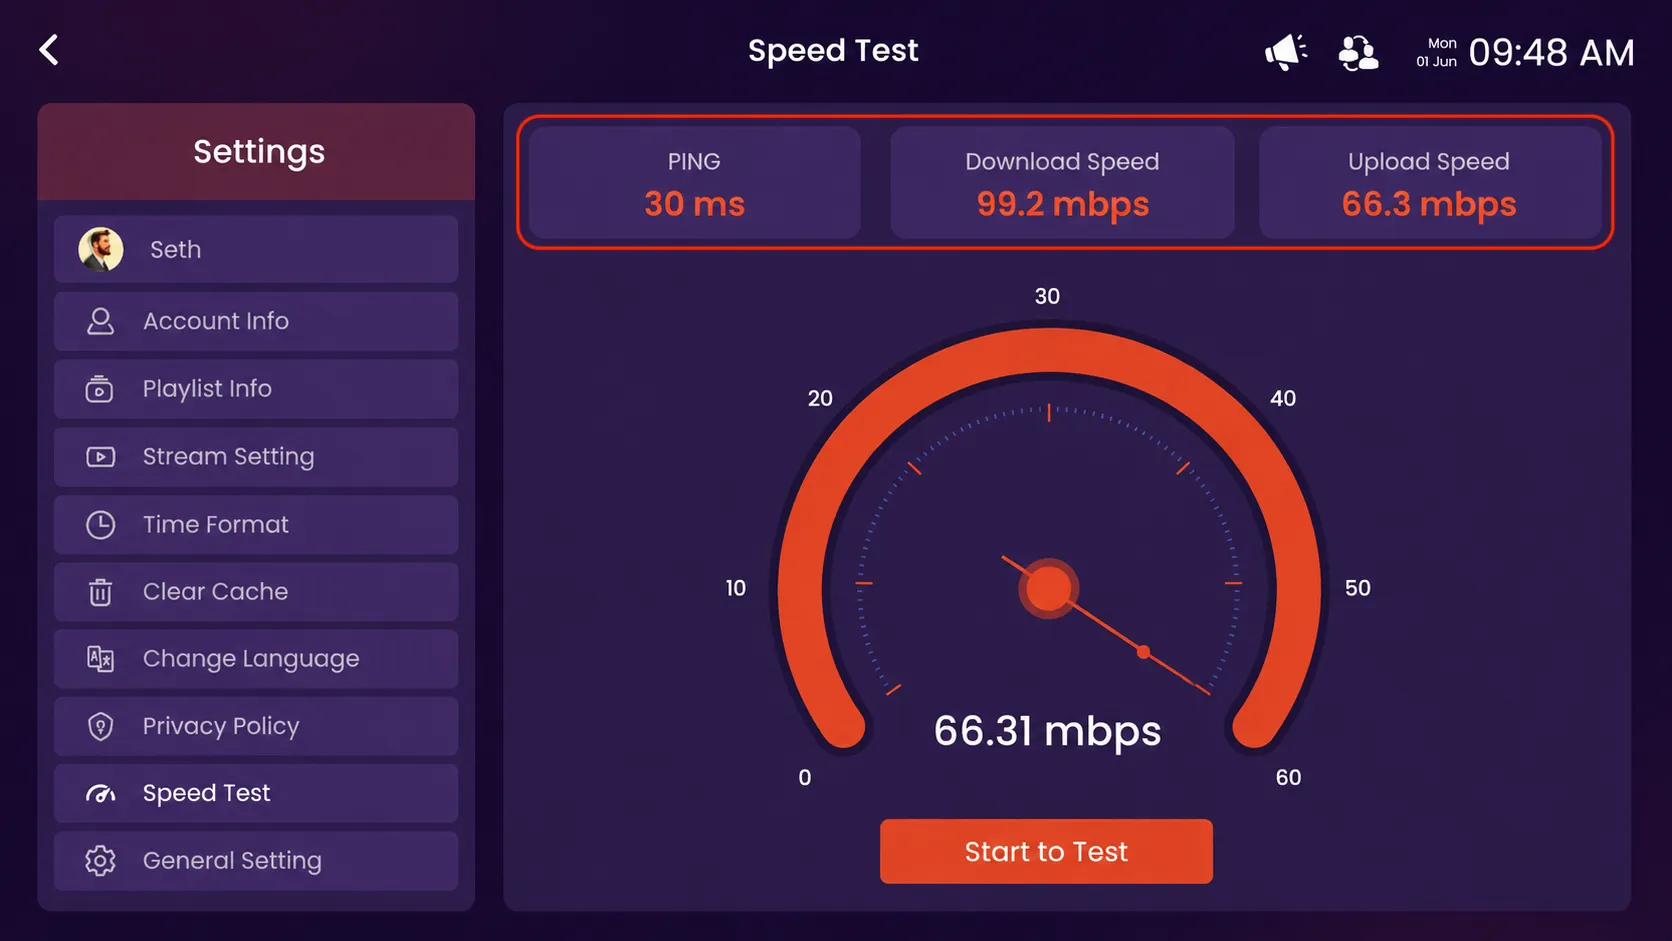
Step 13: Click on Speed Test
Click on the highlighted Speed Test option from the Settings menu.
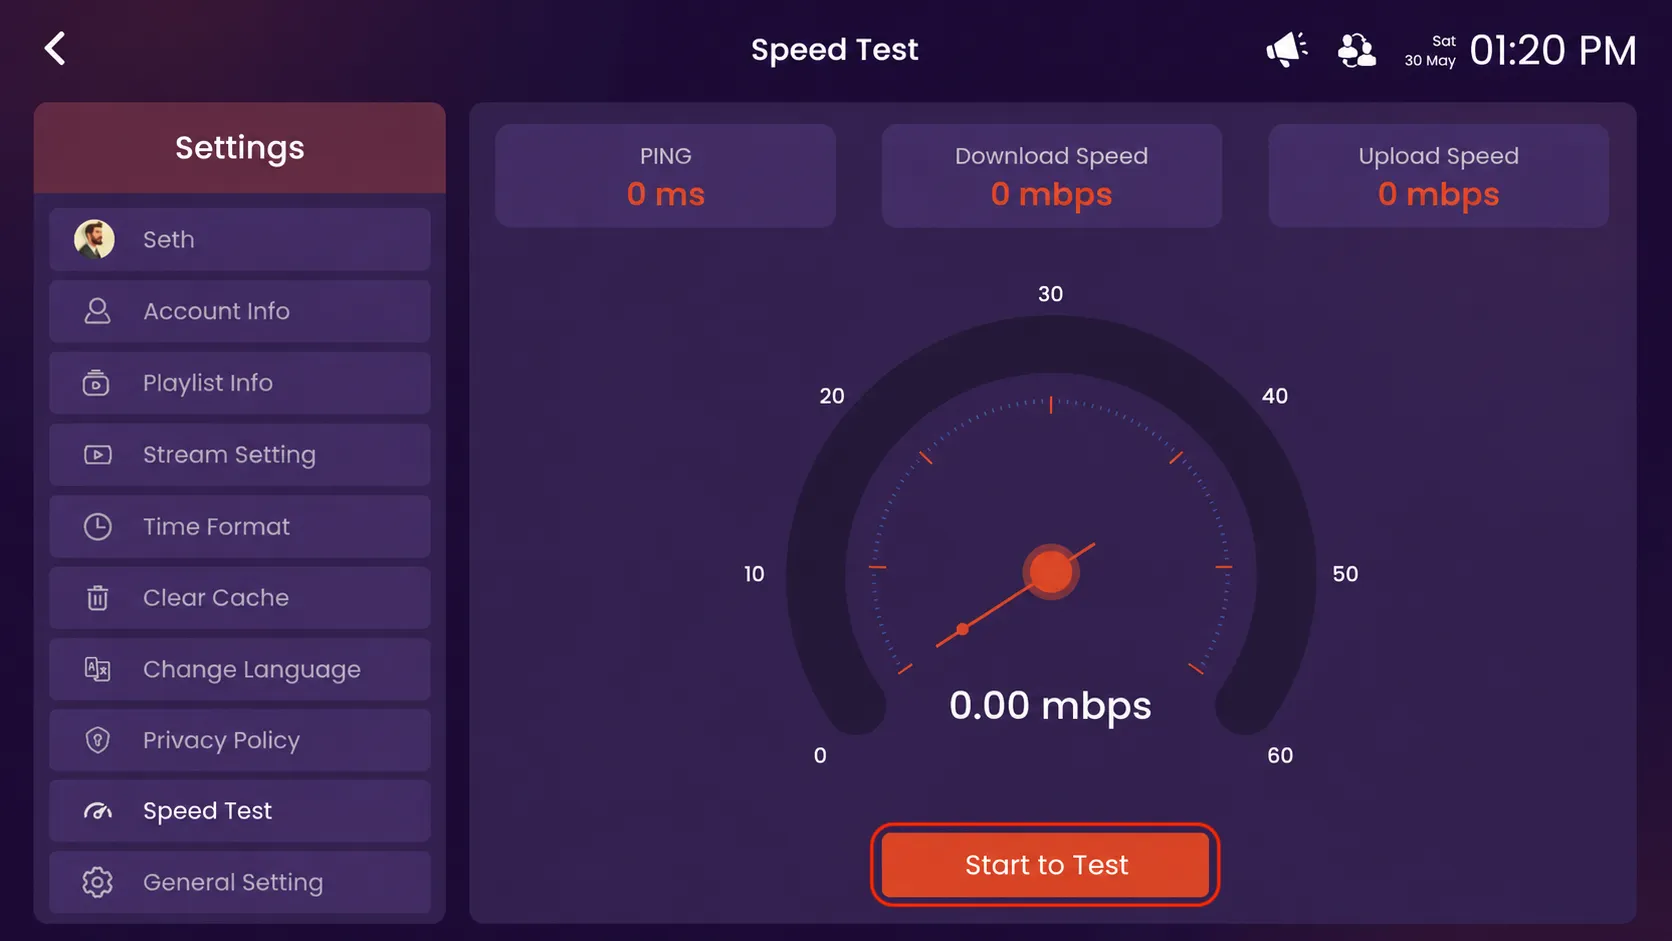
Step 14: Click on Start to Test
Click on the highlighted Start to Test button.
Step 15: View Speed Test Results
After clicking on Start to Test, the app will automatically measure your internet connection and display the current Ping, Download Speed, and Upload Speed results on the screen.
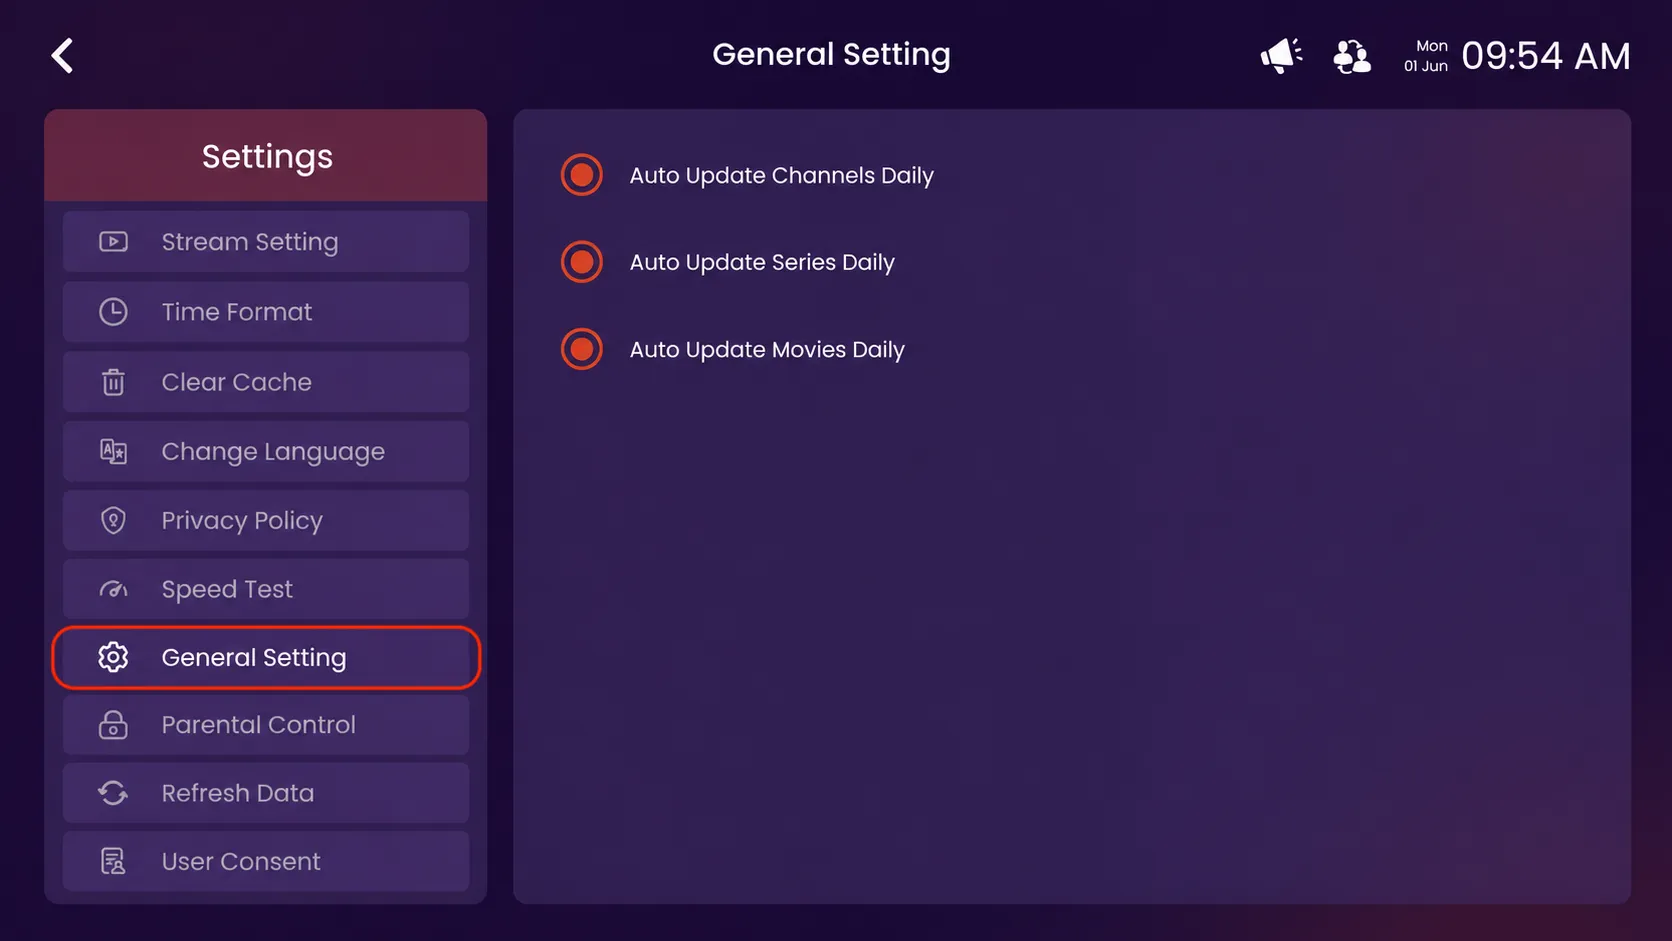
Step 16: Click on General Settings
Click on the highlighted General Settings option from the Settings menu.
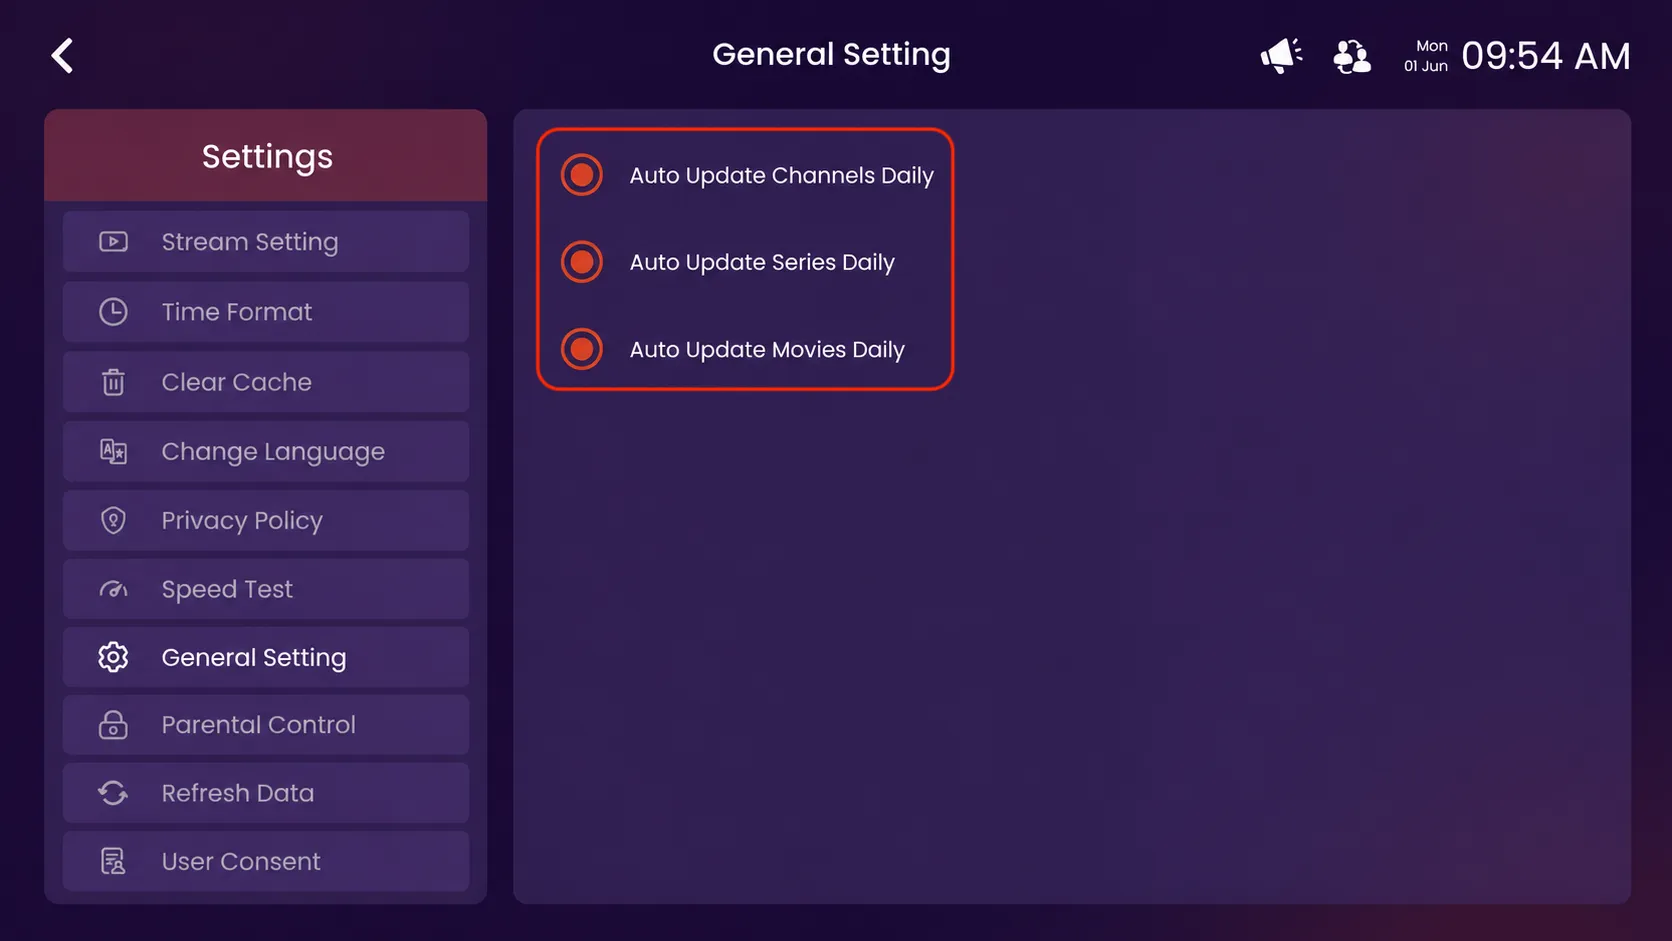
Step 17: Manage Auto Update Settings
Use the highlighted options to enable or disable automatic daily updates for channels, series, and movies. This helps keep your content library updated automatically with the latest available content.
Step 18: Click on Parental Control
Click on the highlighted Parental Control option from the Settings menu.
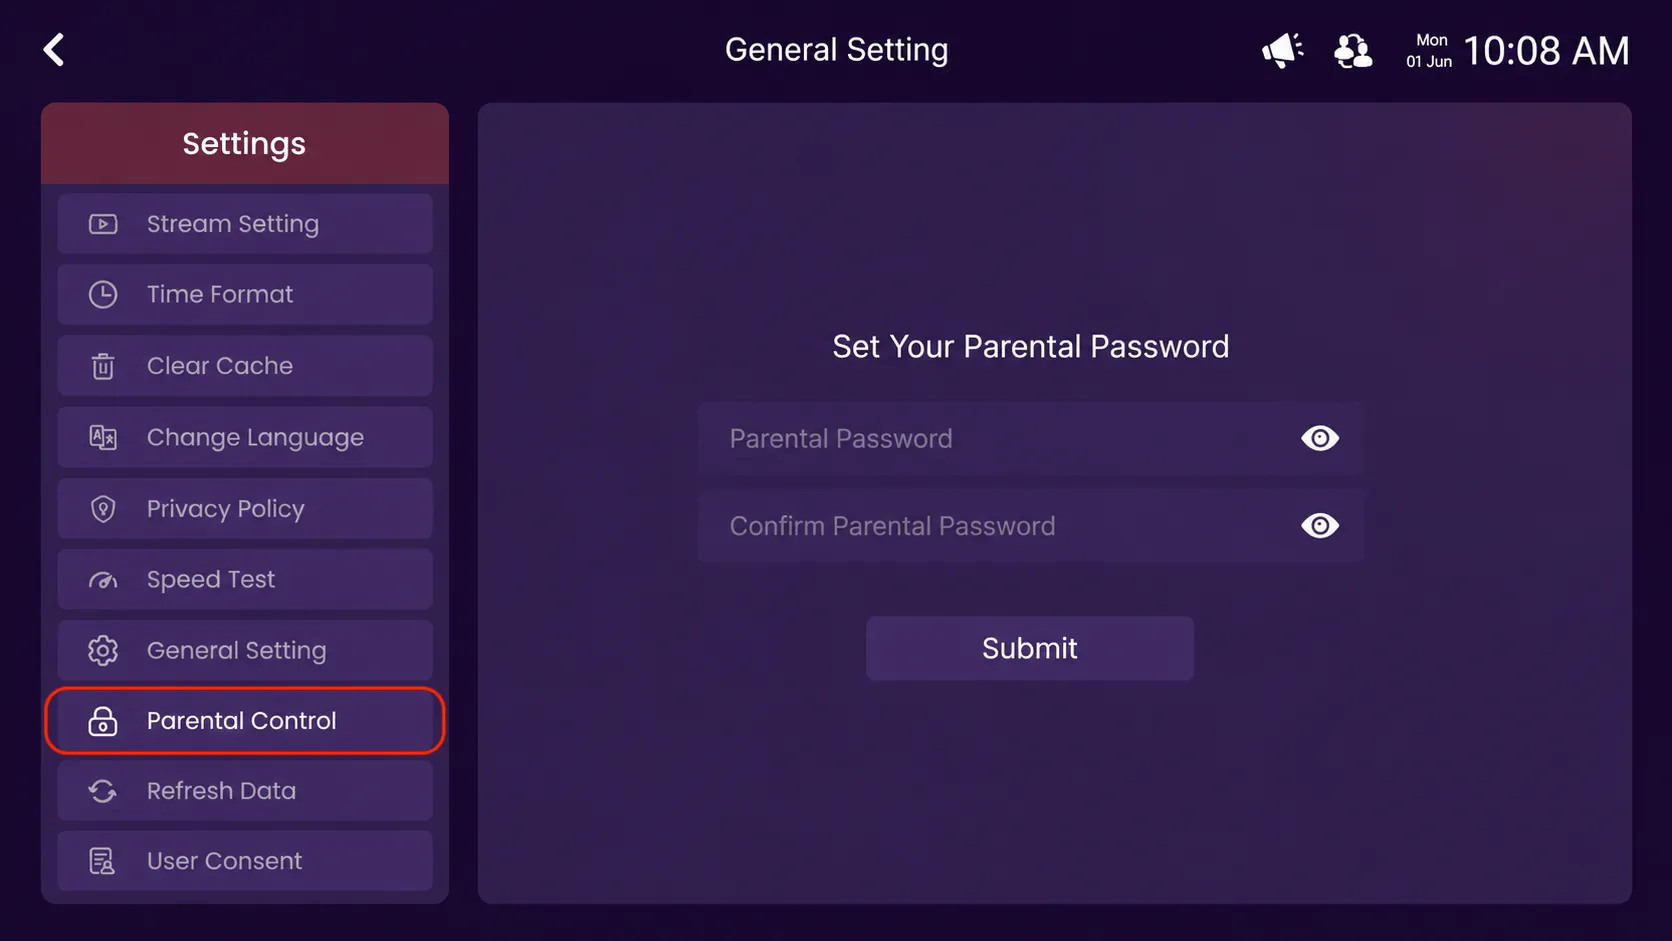
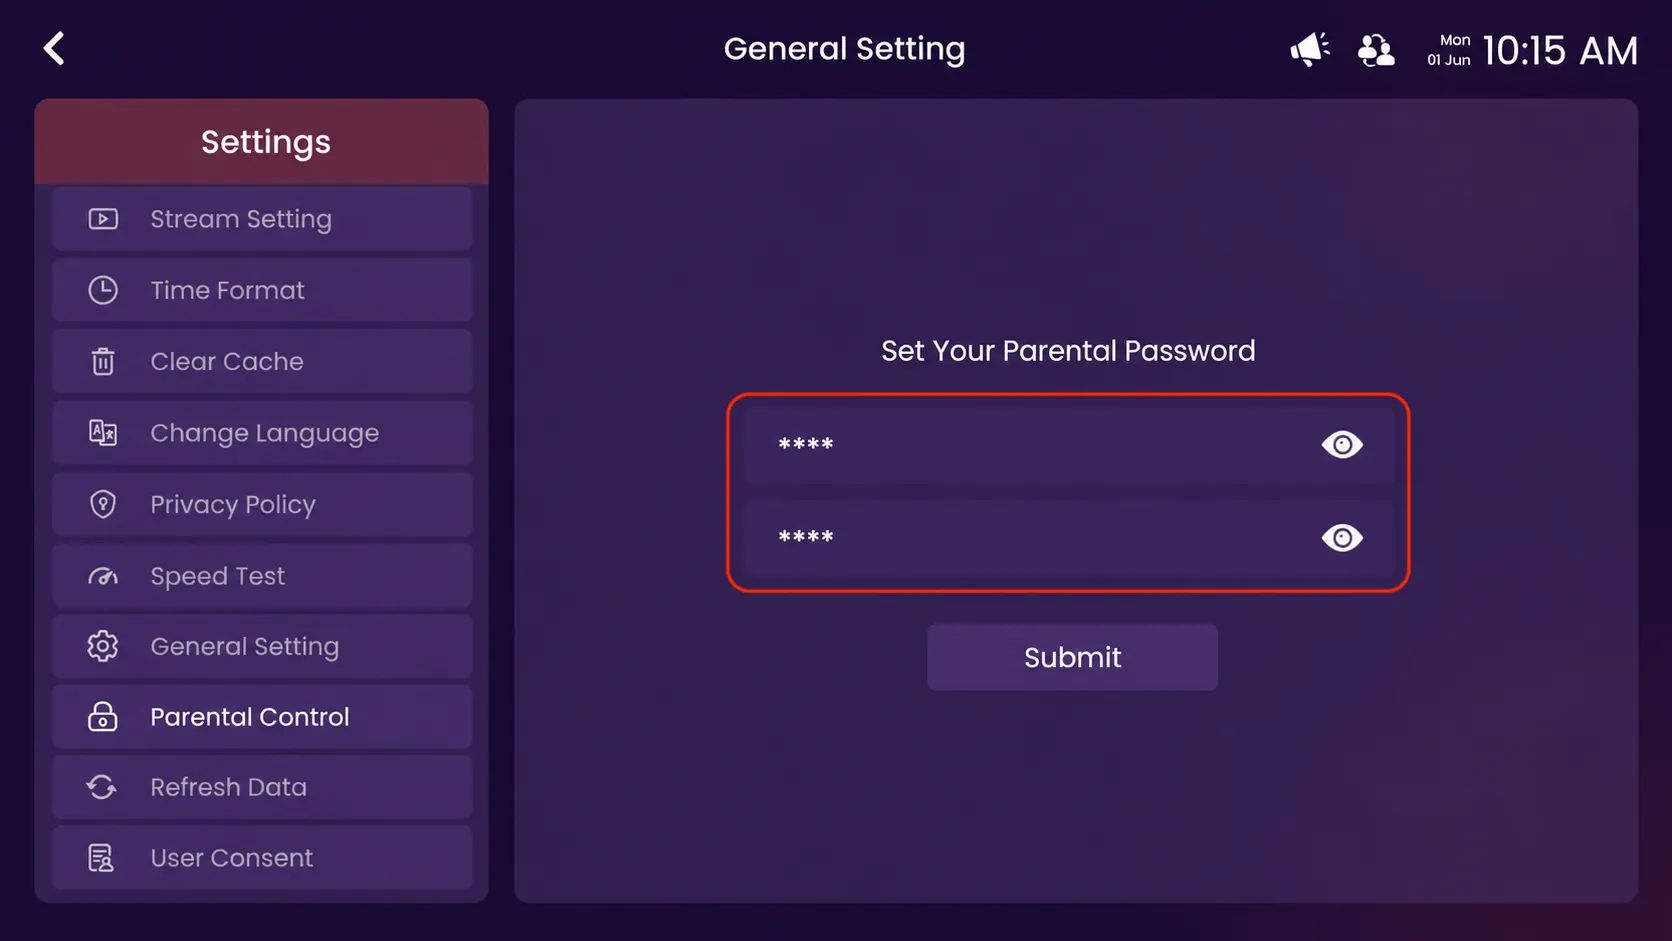
Step 19: Enter the Password
Enter your preferred parental password in both password fields to confirm, then click the Submit button to save and activate the parental control settings.
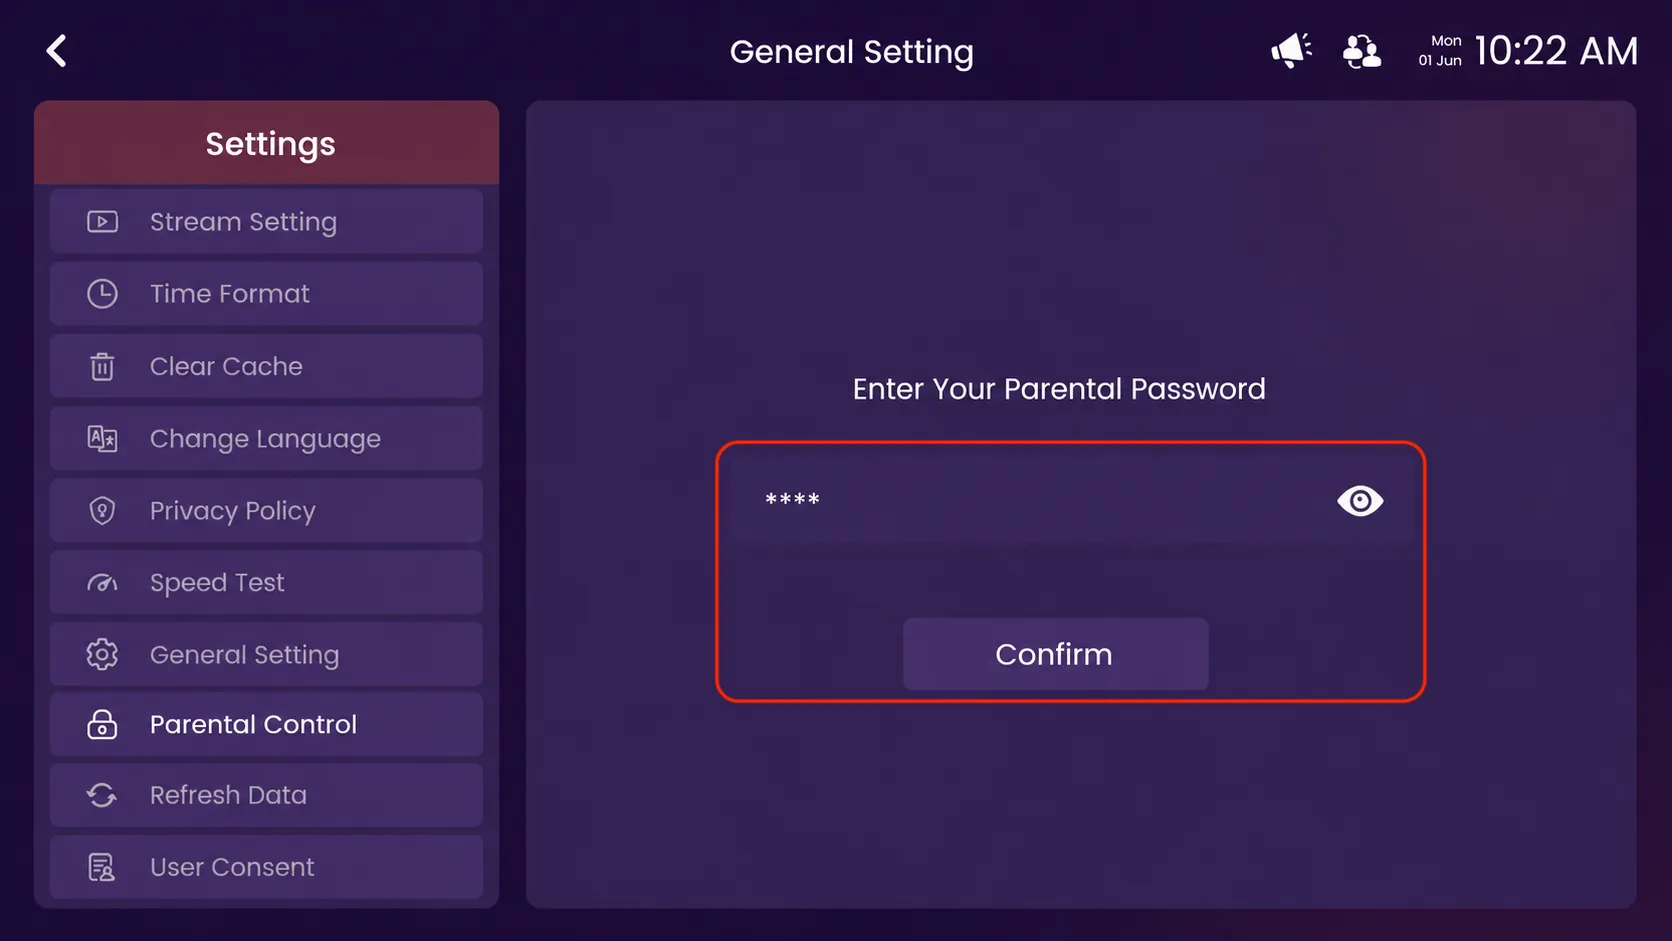
Step 20: Click on Confirm
Enter your parental password in the password field, then click on the Confirm button to unlock and access the parental control settings.
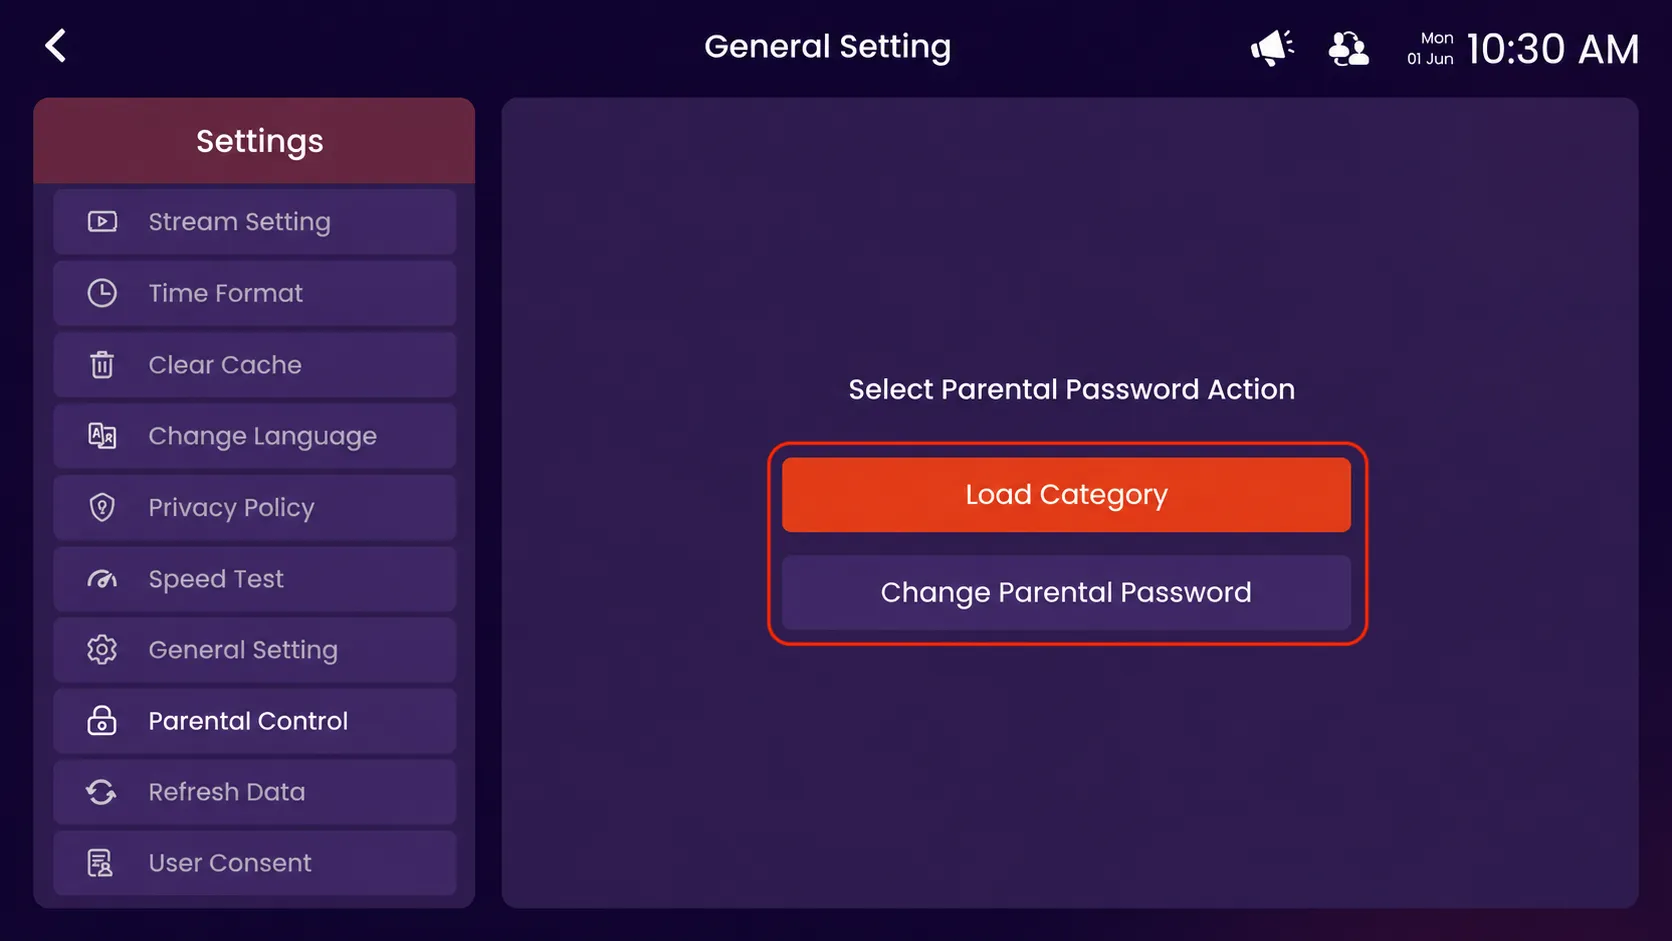
Step 21: Select Parental Pin Action
Click on Load Categories.
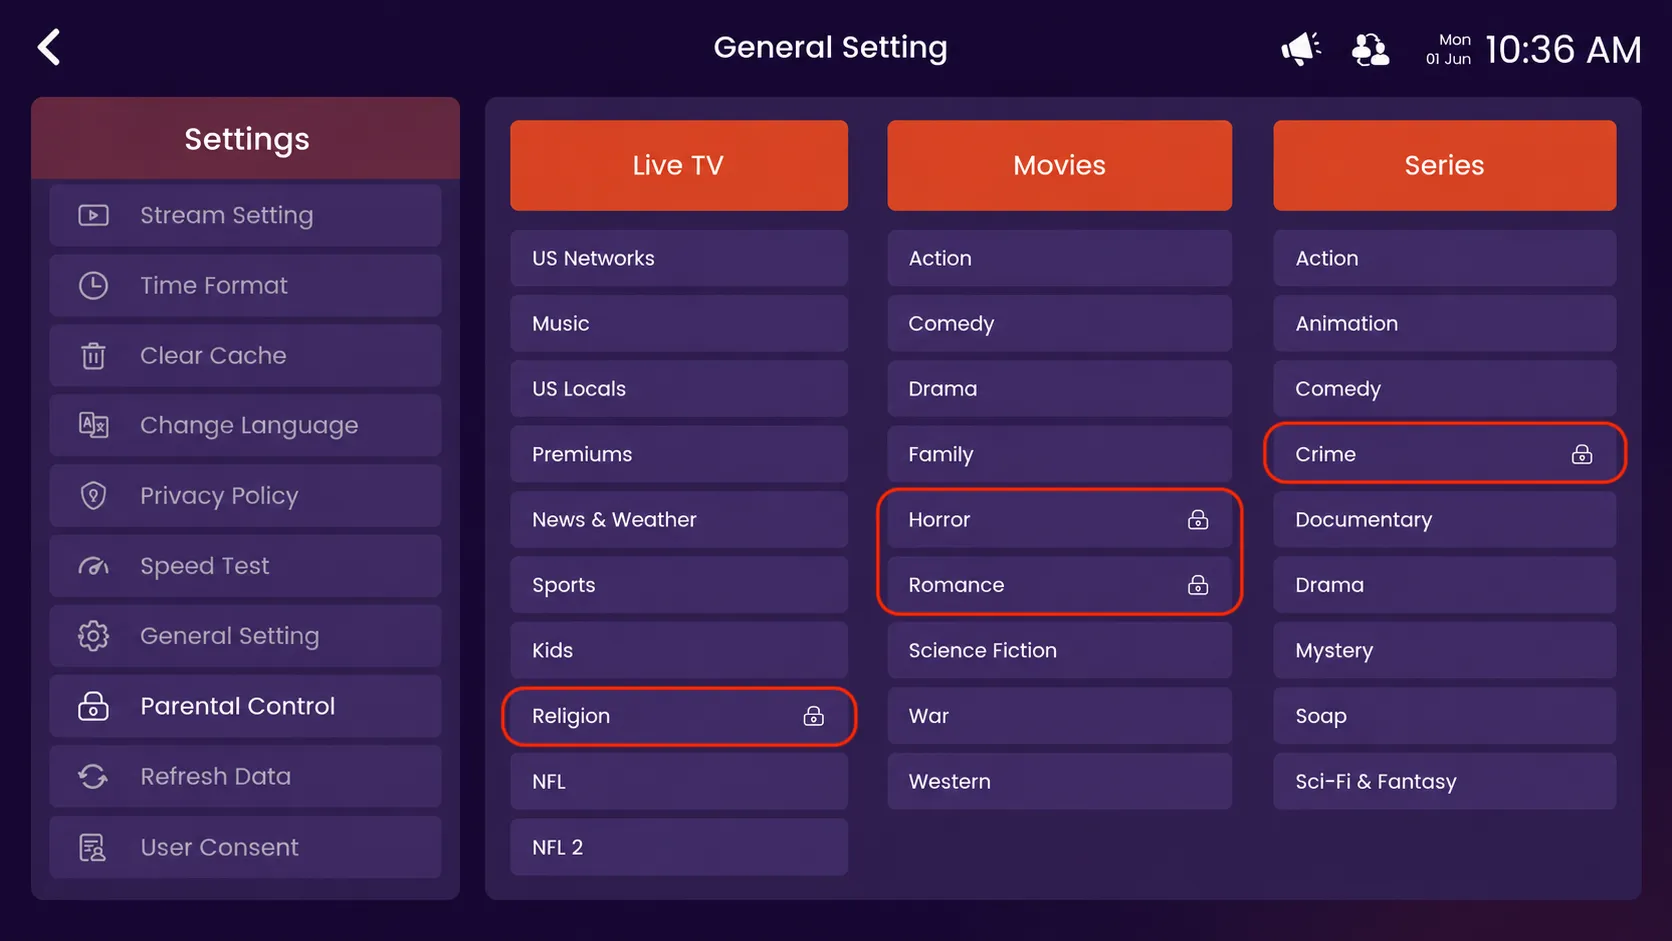
Step 22: View the Locked Categories
After loading the parental control categories, all available Live TV, Movies, and Series category options will appear on the screen. The categories marked with a lock icon will require the parental password to access.
Step 23: Click on Refresh Data
Click on the highlighted Refresh Data option from the Settings menu.
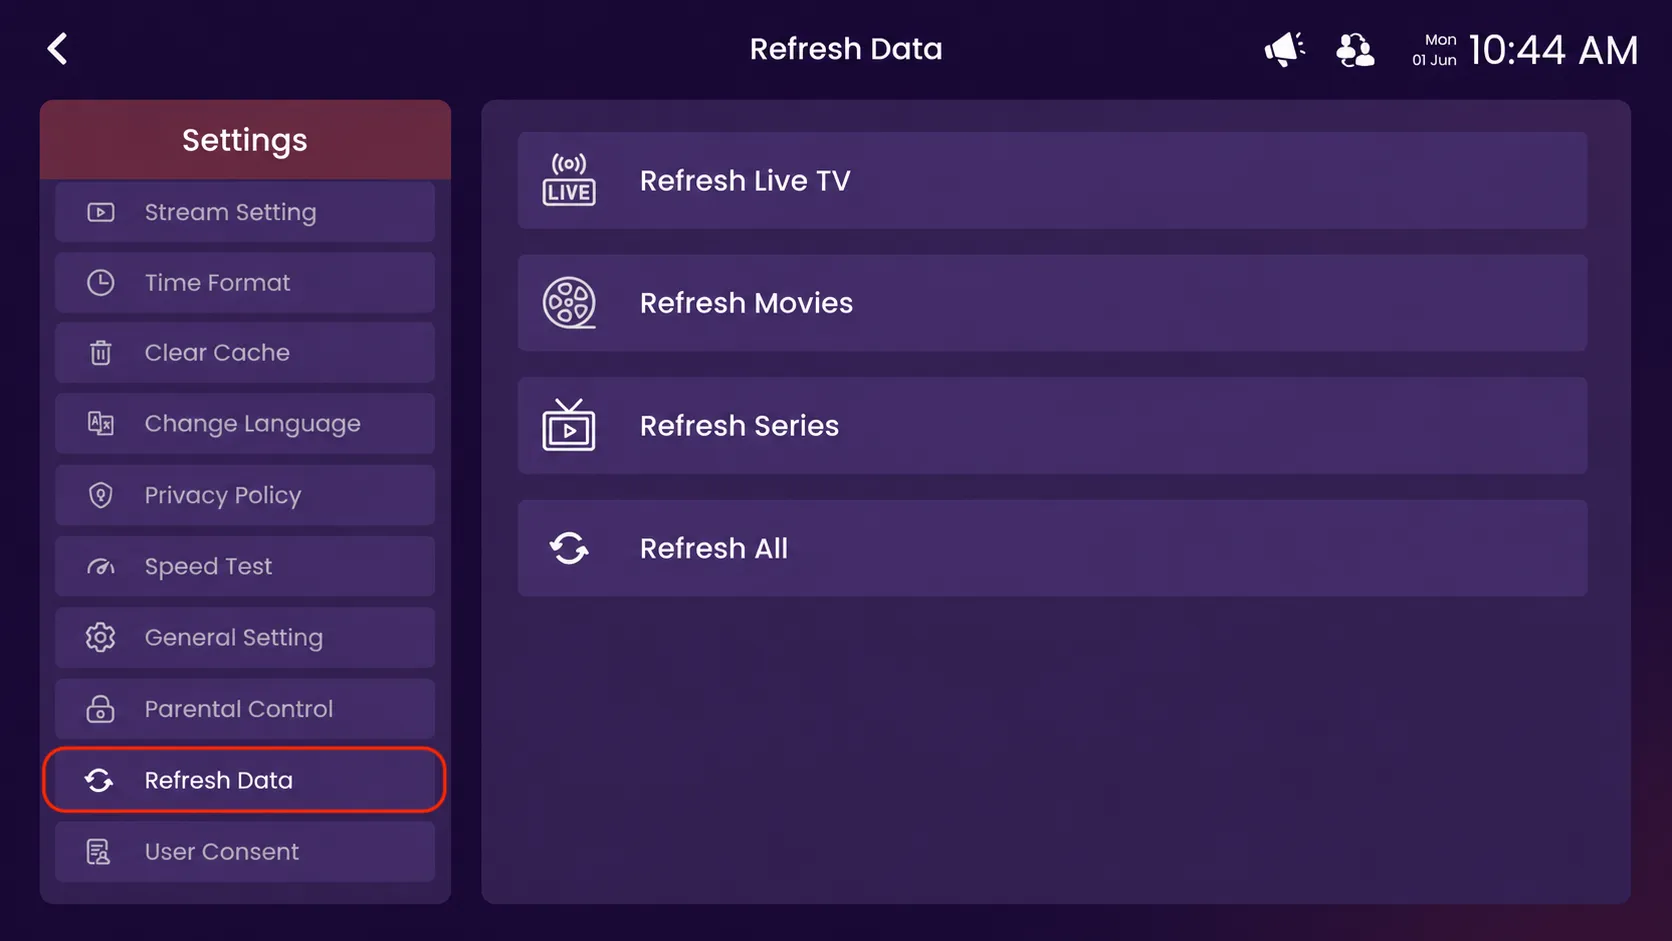
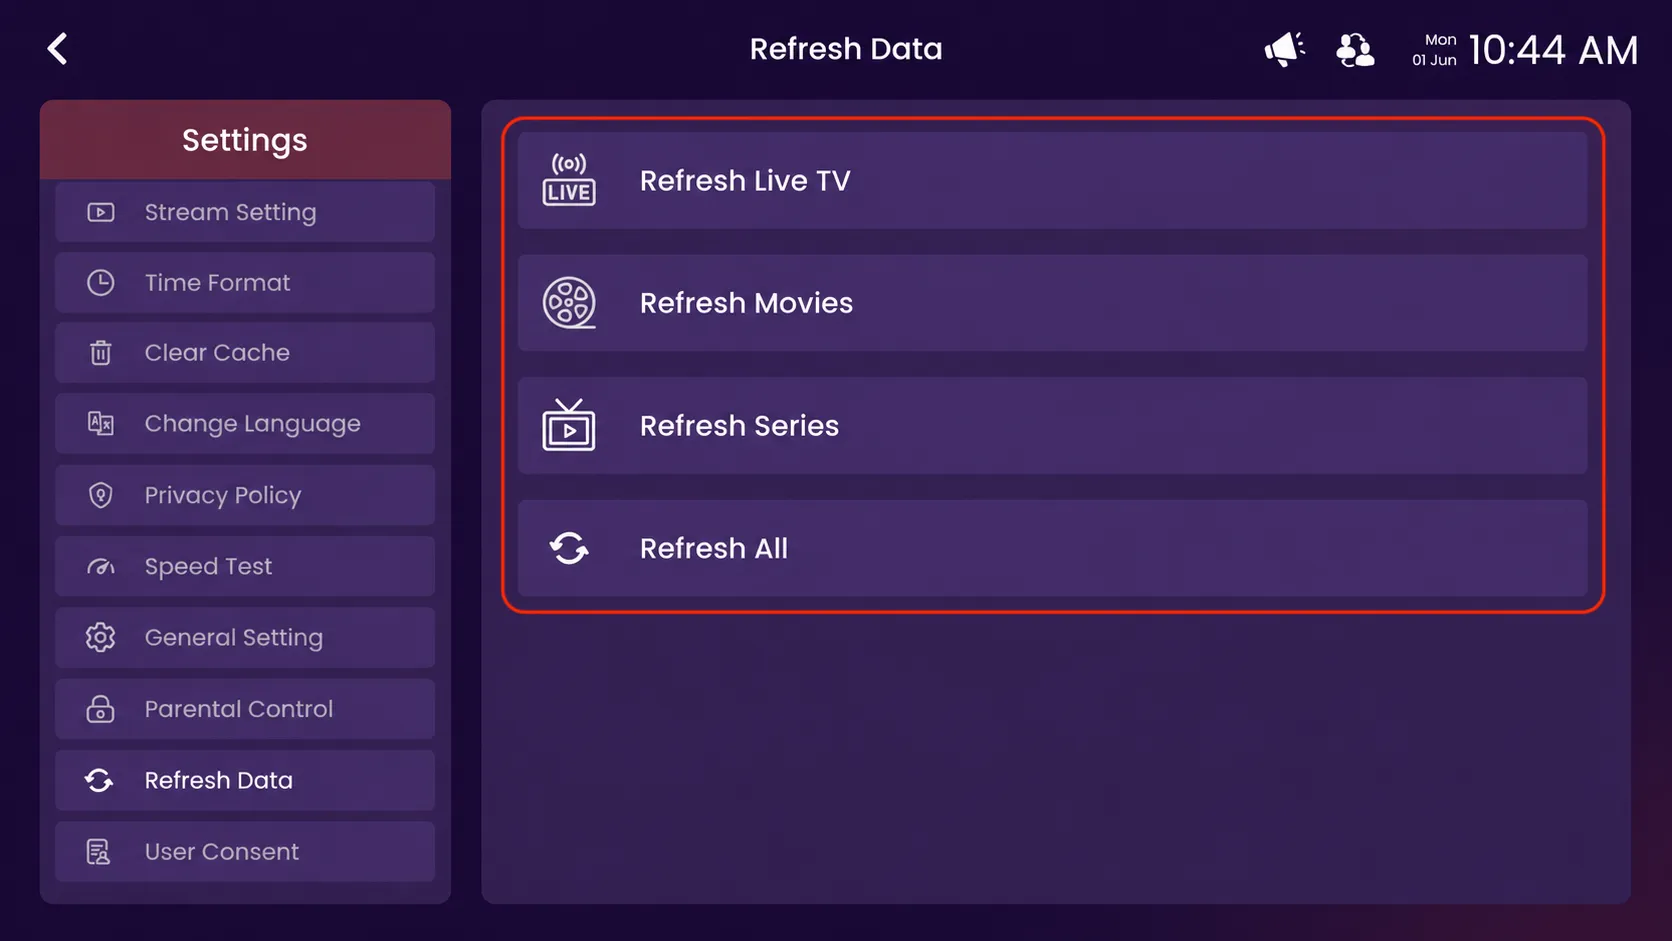
Step 24: Select a Refresh Option
After opening the Refresh Data section, you can choose any available refresh option, such as Refresh Live TV, Refresh Movies, Refresh Series, or Refresh All, to update the latest content and playlist data.